Showing posts with label 16x8. Show all posts

Thursday, 15 August 2013

E21 316: Tyre stretch comparison.

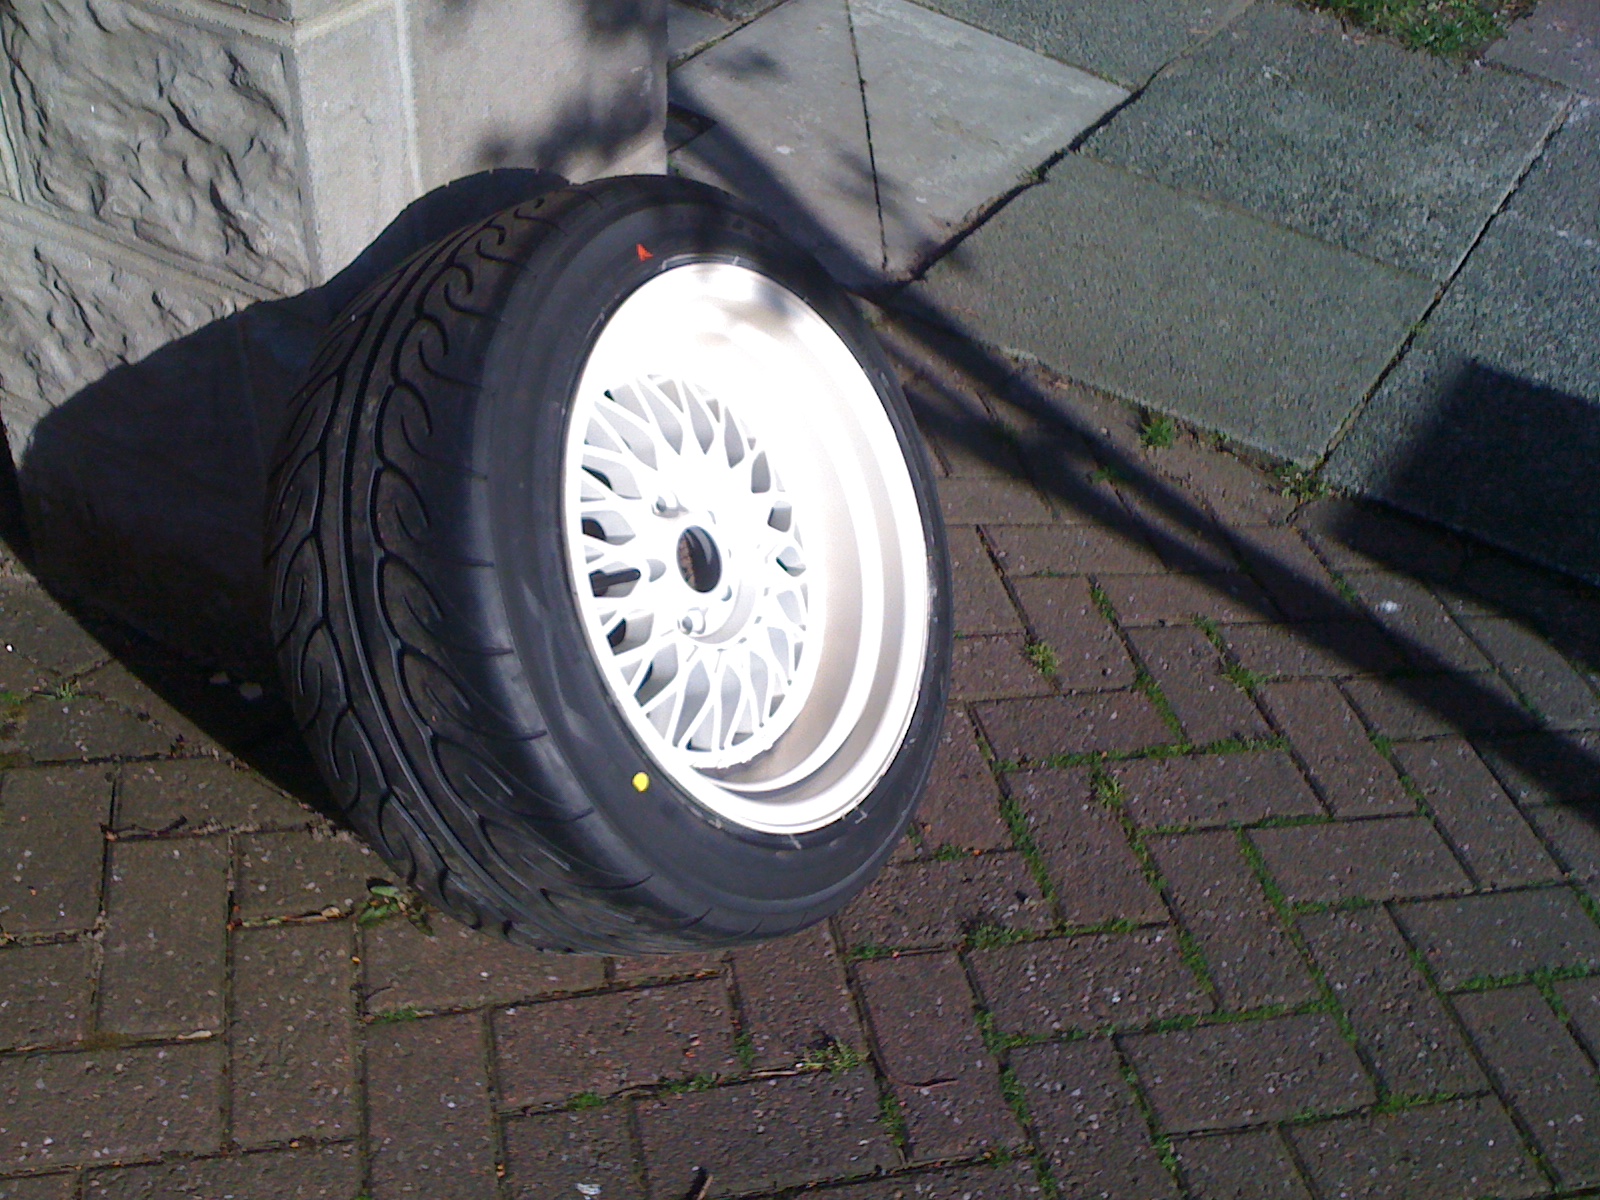
This is for a mate who's bought some 17" BBS reps (Calibre Vintage) for his Mk4 Golf. As with my tyres, the Demon Tweeks guys recommended 45 profile for his wheel size. Im guessing this is for comfort, safety etc., but not with the amount of stretch in mind. The first pic shows my 16x9J wheel with a Yokohama 205/45 tyre. In my opinion this is just too big looks wise and takes over the look of the wheel. The second pic shows my second set of tyres, Toyo 195/40 profile. The difference it makes to looks is staggering, showing the rim off instead of hiding it. In my case the bigger tyre was jammed against my wheel-arch and made me cut more than I needed to when I got the lower profile 40s. 

Lower profiles are harder to find and the tyre sellers will probably say the 5% difference in tyre-wall won't make much difference in order to shift items they have in stock, but as you can see below the difference is actually huge. 

225/45

215/40
May as well be 225, profile same but 5mm less pitch-angle on either side.

Saturday, 20 July 2013

E21 316: Sculpting New Arches...

The car survived a trip with 3 people in and no scrubbing at all on the 16x9s, which I found very surprising, but still I figure the arches are good to finish off. I've neatened up the pulled lips and made a start to filling in and re-sculpting the shape of the wheel-arches, but progress has been slow and my intentions of selling the complete project this summer are looking unlikely. I spoke to the guy who did the re-spray for me originally and he said to get the arches as good as could be and pass it back over to him to smooth them off and repaint them without having to go over the whole car again. Great, though I can't keep hurling money at it, and with more to do over summer I've had less time to spend on the E21 and more time spent enjoying driving it on the new wheels for a few weekends in the sunshine like I intended, not just the odd trip to work. Oh and there is the matter of my daily driver needing MOT attention, but that's a different story.

Never the less, both the o/s arches have begun to take shape. Getting the lips off the bigger wheels and tyres was too extreme a job for my arch-rolling kit, so I had to pull them out with grips in the end. This meant a fair bit less grinding on the o/s rear wheel arch and none at all needed up front. The arch-lip needed to be low for as much tuck as possible, I don't like the cut-arch look, so I got the pulled out lip roughly in line with the slope of the arch and built it up flush with P38 filler. This is as close to the look of those European BBS'd E21s as I could figure, with a slight flare to the lip rather than the flat-edged look of the original arches. This is probably the easiest method of smoothing and saves on a bit of body-filler, enough of which is being used already.


I haven't touched the nearside arches yet, the main thing putting me off being the n/s rear one that was used to test fit those oversized Yokohama tyres and has suffered greatly from the spinning-disc. With the extra lip cut off the rigidity has been lost and the general shape of the arch has deformed, as well as more tyre being visible, about 10mm of tuck being lost. I guess my only options are to try and spot-weld the rough section of lip back on that was cut too far, which I still have, and rebuild the shape of the entire arch in filler, or buy a patterned-part wheel-arch off eBay for £25, cut out the current one, weld in the new one, smooth it off, pull the lip out and fill all that in. Well, there's no doubt the first method is cheaper and a lot less work, but this is a large area to be filling and smoothing and a wide margin for error, plus I don't even know if the bent arch will accept the bit I cut off without messing it up even further... watch this space!

Monday, 3 June 2013

E21 316: Stance looking rather complete...

Squat, slammed, stanced, hellaflush, scrapin' and eating the modern metal for brekkies!

Monday, 27 May 2013

E21 316: More Open Arch Surgery! Wheels finally on...

Got the grinder out again today and tackled the job I haven't been looking forward to - cutting away the other rear wheel-arch. Progress was quick and smooth for a change, I guess because I had an idea of what to do now, but I think the lower profile tyres played a part. If only I'd bought them first time round I wouldn't have had to butcher the n/s quite so much. A good notch had to come out at the bumper shut-lines as these were the main bits sitting on the tyre, but less of the outer lip had to be cut away and the arch looks a lot smoother than the last effort.


The main problem with scrubbing was coming from the inner skin of the arch and the best way to get that off was still to peel it back, cut wide flaps in the metal using tin-snips and work them with grips until they snap clear.


It's been quite a bit of effort and hacking away at the car was heartbreaking, but at last the super fat wheels are on and no scrubbing whatsoever. Now to see about neatening up those arches...

Monday, 20 May 2013

E21 316: Stretched Toyos first try + more spending.

Tried out the 8Js on the front with the new 195 Toyo T1Rs using 20mm spacers and there's a lot more room at the arch-lip now. The tyre doesn't catch at all turned hard-left, thought it would going over a bump. Hard-right the tyre is still catching the front valance slightly, but about 1cm cut away should be enough now and a little off the fender where it protrudes from the bumper - none of the bumper itself though. I had hoped to get away with smaller spacers on the front, but even with the 20mm spacers from the rear, the inside rim of the wheel is still 5mm inboard of the 15x7Js and there is not a lot of headroom.


I just haven't found time to try out the 9Js on the rear today as the valve is bust in one and on the other, about 6 inches of the bead has just been refusing to seat. My leg just couldn't take any more foot-pumping so I got hold of an air-compressor from a friend and took the tyre to nearly 90psi this morning, but it still wasn't having any of it. Eventually, after two goes deflating the tyre almost completely and trying to brush in soap between the tyre and rim, then taking it back up to about 65psi, the bead finally popped. The maximum pressure rating on the tyre is 50psi, though it says use no more than 40 to seat the bead, so it just goes to show that when the seal is tight enough it can take over twice that and still not seat. Bead-blaster machines can jet up to 200psi in one go and that doesn't even shred the tyre to bits so I'd be keen to know at what pressure a good new tyre would rupture at. Even so, always take the utmost care when inflating tyres past their rated pressures at home!

Apart from 4 new valve-cores (£2.99) and a valve removal-tool (£4.99) from Halfords, I've had to do yet more spending on parts as the project can't move on without them and I want to be getting somewhere near finished next weekend when we have the bank-holiday off. First up are adjustable camber-plates for the front, a must for style and it will likely give me a bit more room to play with before starting to cut. They're not approved for sale in the UK, so lets hope they make it here from Poland before the weekend - fingers crossed eh! Looking forward to these, though quite pricey @ £105 delivered, but whatever, they're the only ones of their kind. It's also time to stop digging my heels in and buy another set of spacers to go on the front, swapping the ones over from the rear is becoming a chore. I'd hoped to get some alloy ones to save hub weight, but again for easy access, the right centre-bore without more spigot-rings and to get the bolt-on kind I want, yep you guessed it, more steel ones. Another £59, oh well, roll on next weekend.

Sunday, 12 May 2013

E21 316: New Low-Pro Tyres - Toyo T1R + Stretching Issues!

Thanks to finding a buyer for my ill-fitting Yokohamas so quickly I was able to buy another set of tyres this week without having too feel too guilty about how much I've spent on stance this last fortnight. Stance is what this car is all about though, so money should be the last thing causing me to compromise. You can't fight progress after all...


I got back to mulling over sizes and decided not to take any chances on buying tyres too big again and went a couple of sizes smaller on width as well as a lower profile. The 8-inch wide front wheels have now got 195/40 tyres, as opposed to 205/45. That 5% decrease in the tyre-wall is more pronounced than I figured, but they still just about went on with a couple of assistants pressing the sides in. Still no need for the butane / lighter trick or a 'bead-blaster', but boy are they stretched! I think we're pushing the boundaries of legality here [Offence Code 112].


No such luck with the 9-inch wide rear wheels. With the lower-profile sidewall, the slightly skinnier 215/40 I went for just don't quite reach the inner-rims enough to coax them on, as the 225/45 Yokos did. With the help of my work colleagues we tried the butane / lighter trick several times to no avail. Either the fuel/air mixture wasn't right or we were just plain doing it wrong, so after starting to smell melted rubber I gave in and decided to read up a bit more. One guy at work knows someone not too far away who has one of the all fabled 'bead-blaster' machines [explained here on TyreBayDirect.com], but as is so often the case he hasn't seen him for a while and it'll take a bit of notice to get hold of it. I don't like to hang around so, determined to get something done this weekend, began scanning the forums again to see if there was another trick I'd missed.

To my amazement there was - the 'bicycle inner-tube' gambit. This involves stretching a bicycle inner-tube round the wheel-rim and inflating it to create an airtight seal in the gap between the rim and tyre, deflating it as the tyre expands and finally sliding it out as the bead is reached. It sounds almost simple and to be honest it is. Unlike the butane / lighter method, which is very hit-and-miss when you don't know what you're doing, the inner-tube trick has a much steadier learning curve. You can see what's going on, gauge the pressure, find leaks easily and if the tube is going to pop out and break the seal it does so gently and with fair warning. With a bit of common sense anyone can handle a tyre popping off the rim at 40-odd psi, so this is by far the safest way to stretch tyres at home - I even managed it with a foot-pump, though I wouldn't like to do that again. It only took two proper attempts to get my first tyre on this way and, of course, there's zero chance of damaging a rim or melting rubber. Here's a great vid on Youtube of how easy it is - https://www.youtube.com/watch?v=lzxHYEdA8Qo, and it really wouldn't take many tries to get it down that good. I got 3 inner-tubes from Halfords for £10, so even if you need a dozen practise goes it still costs less than paying someone.

It's best to keep the tube size close to wheel size, but a bit smaller to get a tight fit. For my 16" wheels I bought 14" tubes, but a guy on the forum that convinced me was using 12" tubes on 15" wheels, so a few inches smaller is fine it seems. Getting an airtight seal was the most difficult part, but once you get a few PSI in and the tyre begins to press onto the tube you're away - make sure the valve on the tube is well proud of the seal as it inflates. Deflating and sliding the tube clear without breaking the seal can be troublesome, but it is just trial-and-error needed to get this right and it doesn't take much. Even though my first try was a fail and popped the seal it still managed to fully seat the opposite-bead, which is something two of us couldn't do using the old suspending the tyre on axle-stands and jumping on the wheel trick, so this is a good, safe method to do that. On my successful attempt, I still got a bit of tube caught in the bead, which is still stuck in there and caused the tyre to need quite a bit of pressure to pop onto the rim over it - about 65psi in fact, thankfully as with the foot-pump my legs just couldn't make any more! Still, the skinny 215 is on and I would recommend this technique to anyone stretching tyres at home.


Friday, 10 May 2013

E21 316: The wrong tyres! Sold.

Wallace and Gromit are back, this time they've got the right trousers on, it's the tyres that are right out. They're just too hi-profile and are wreaking havoc amongst the villages wheel-arches. Yep, those wicked Yokohama Advan have had to come off again and go on to eBay, as the wheel-arch chewed 2 of them pretty badly and they can't be returned, but the damage is only in the tread so I figured someone would want them cheap. Bearing in mind they've only covered about 0.2 of a mile and are worth ~£500 new, I figured £300 would still be a good deal and it looks like I was right - I had a buyer on the first day of the auction and got damn close to my asking price. The latest set of tyres have ony cost me £280 anyway, so I've had more expensive screw-ups it must be said.

The new tyres I've bought are good-old Toyo Proxes T1R, a bit boring and predictable, but again it's tough to get matching tyres in the right sizes. I am sad to see the lovely semi-slick design of the Yokos go though, but they just don't make a 40 profile and Toyo do, the new ones are 195/40/16 for the 8J front and 215/40/16 for the 9J rear - it's going to be quite a stretch! Watch this space.


These really were some of the coolest road tyres I have ever seen, what a shame they're like big balloons, hopefully the new owner will get the benefit of all that grip with the Scooby Impreza he's putting them on.

E21 316: 8Js won't fit the front...

After all the hacking and cutting on the rear arch to only discover I needed smaller tyres, today I threw an 8J onto the front with 20mm spacers, as without they just hit the track-rod end and wont even sit flush, and I find that space is even more limited at this end.


With the lip pulled out this time by hand, then neatened up a little with the baseball-bat / metal-bar rolling trick, the big 45-profile tyres still contact the back of the arch.


When steered hard-right, the tyre rubs past the edge of the bumper and fender, so it had to be jacked to turn the wheel straight again. The tyre also bent the edge of the front-valance, cracking the fibreglass repair I did last summer. A good inch would need to be cut off the valance here and I'm not sure lower profile tyres alone will remedy this, so some will need chopping off anyway, best keep it to a minimum. Oh, and I must save up for those camber-plates!

Sunday, 5 May 2013

E21: Getting low on sixteens...

They say fitting 16x9J to the rear could not be done... but people have done it. They say it cannot be done without cutting the arches... and it seems like they were right, so before I make a total mess of the car by grinding away those beautiful rear arch lines [already started yesterday :s - pics coming soon], I thought I'd throw up some more inspirational pics to remind me that I'm chasing dreams here, not just fitting fat wheels...


Sunday, 21 April 2013

E21 316: Fatter Wheels - 16x8/9J staggered BBS RS Split-Rim Reps!

I love the old Melbers, but couldn't resist buying some bigger, wider rims to fill out my arch clearance. I've ended up with 16x8 for the front, which should be ok with 20mm spacers, and 16x9 for the back. They say it can't be done without cutting the arches. Well, I'm going to have to find a way, because I need that 3.5" lip and I ain't cutting. 


9s stick out a bit even with just 20mm spacers...


The 8s below are for the front, but fit the rear with a bit more clearance than the 9s...


...but lets face it, they're not deep enough!


Fat rims.


With a bit of negative camber the rim is not far from the arch-lip and I think a stretched tyre will go under, but a bit more rolling will be necessary...


Roller skate style!


9s may need a little more spacing on the back to get off the strut and trailing arm...


And no, you may have guessed, they're not real split-rims, they're one-piece replicas and cost less than £400 delivered from royal_wax on eBay. A genuine set of BBS splitties has been floating around on there too, yours for £1600 without tyres, so I think I'll suffer with the replicas for now. The finish is a bit cheap and tacky, but hey, I'll be painting them up in Panama Beige anyway and I wouldn't be doing that to real ones. Even so it's been anther expensive week and I've got to find some rubber this week... I'm thinking 205_40_16 front, maybe Falken, and 225_40_16 rear Toyo T1-R, so let's hope I can get another cheap deal through work and that should save me a few hundred quid! I wish someone would hurry up and buy my Melbers - surely with the Toyo T4s stretched on they're worth £300 - come one people!