Monday 28 July 2014

E60: Bad Oil Leak - was it running too well after rebuild?!

I've covered 125 miles on the new head / ground piston since putting the engine back together last weekend and the car has performed great. However, I was checking the oil and finding it hardly showing on the dipstick. On Wednesday night I poured in another half litre of oil and it began to show on the dipstick, about one third up. It was in the same place the following morning, so I poured in another half litre, got it up to near max on the dipstick and carried on using the car. Almost immediately I could smell fresh oil from the heater / air-con. There had been no dropped oil for the first few days [engine under-trays still off], but there sure was now. A small patch every time I pulled up and stopped the engine. Some investigation revealed no oil to be leaking while the engine is cold, but once up to temp. it is a constant drip from underneath the turbo area and a few drips from elsewhere, mainly from oil running along the sway-bar and cross-members. Oil is also ending up in the air-intake and being burned by the engine. This is not good!

This was after running the engine for 2 minutes on a fresh piece of newspaper!
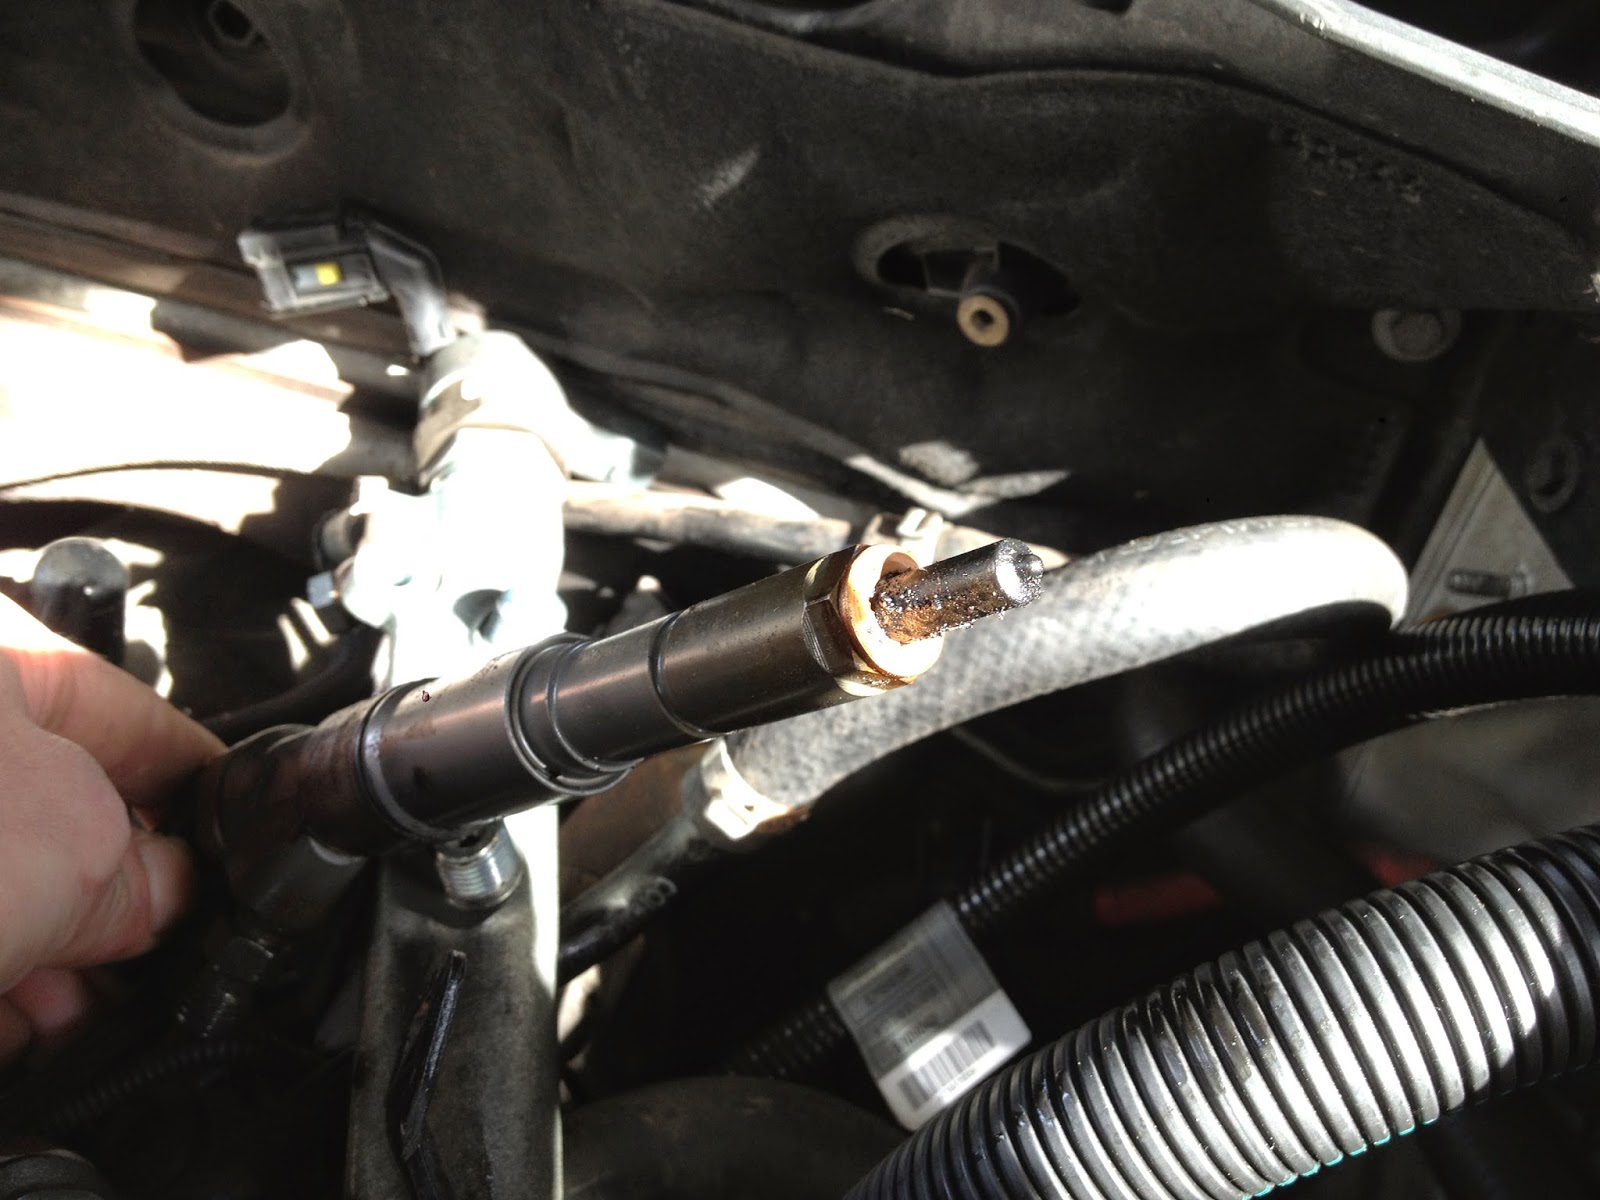
Here is where the bulk of it is coming from - the turbo oil-feed pipe. It may also be from the oil-return pipe, located under the turbo. Hopefully this is too much oil or oil-pressure finding its way out through the loosest seals. If not, the turbo seals have gone and the blower is on its way out.
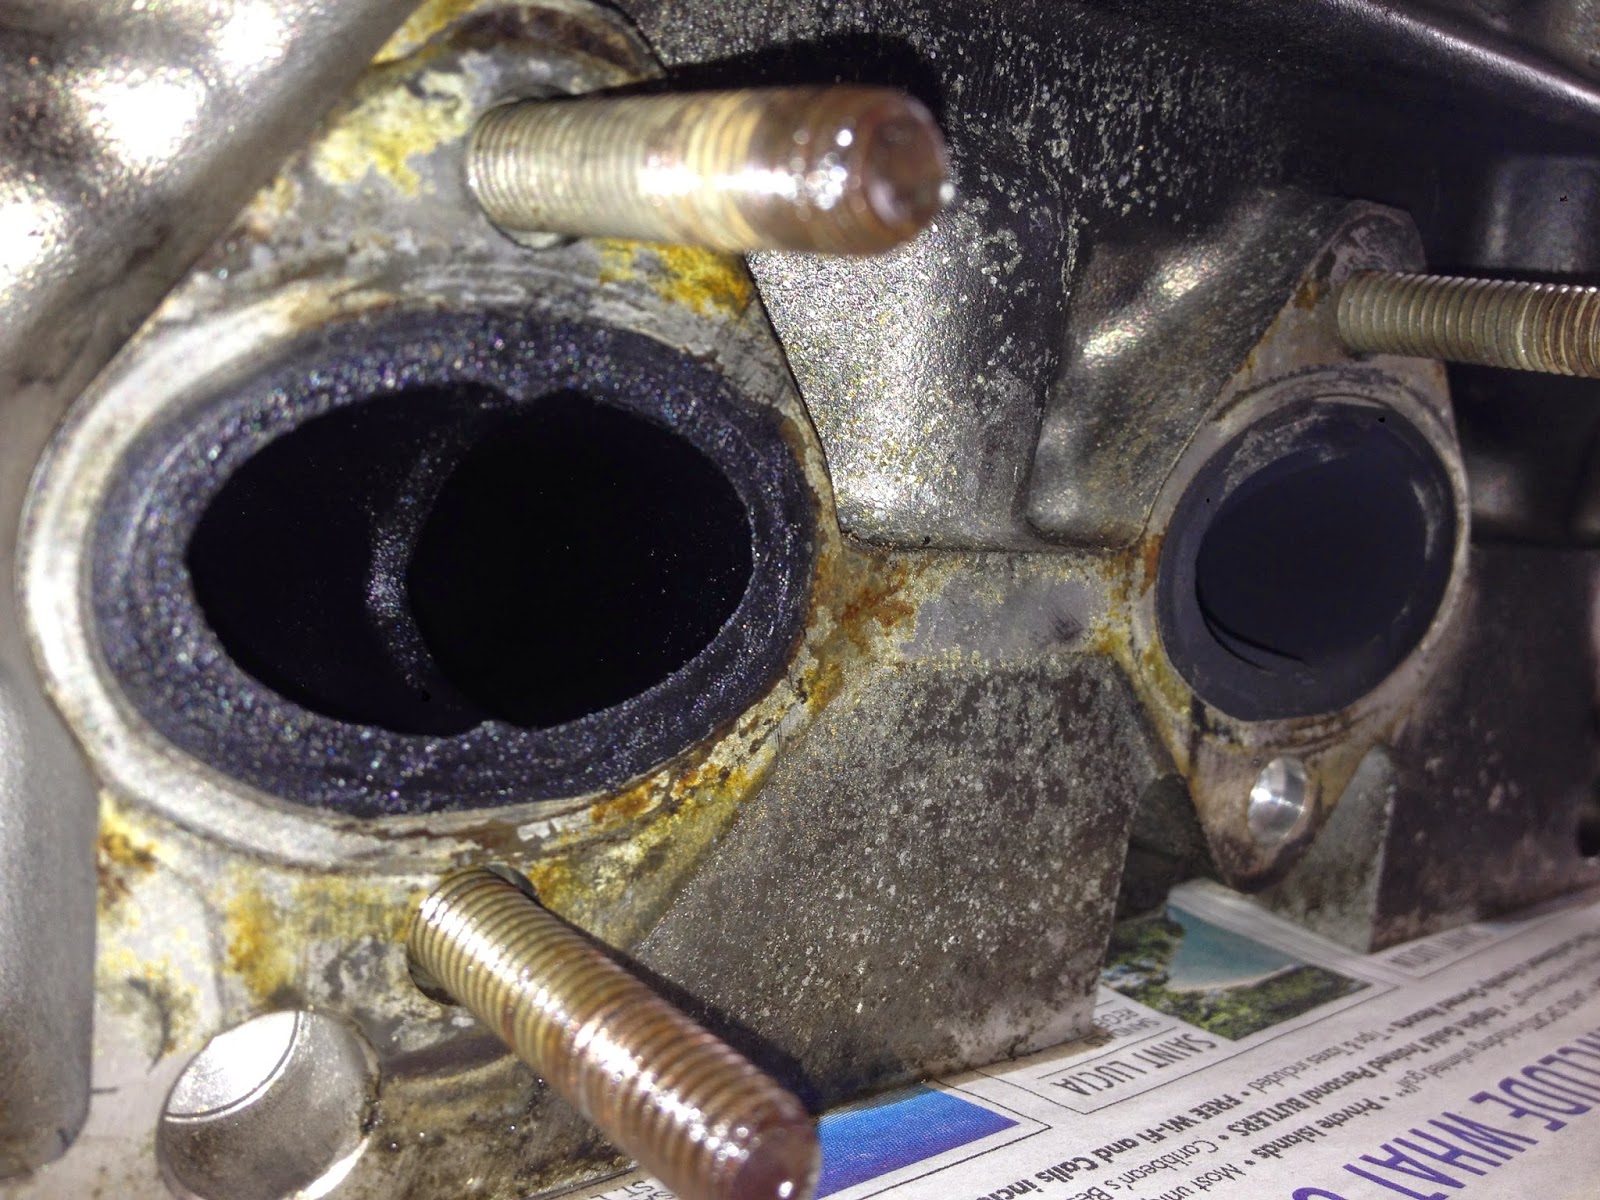
Oil is flying into the air-intake also, so the injector tips have become quite cruddy with oily residue. Nasty, though the nozzles remain quite clean and all 6 appear to be working OK.
This is the breakdown:
  • Simply an overfill - oil-pressure is too high and leaking from multiple loose seals.
  • Turbo oil-seal gone - oil is gushing from the middle of the turbo and getting into the inlet.
  • Blocked CCV - the crankcase can't breathe is causing high oil-pressure and leaks.
  • Complete turbo failure - bits of swirl-flap unbalanced the exhaust-wheel and wrecked the spindle, oil is now leaking from the centre-bearing and the blower is finished. 
There is a little bit of lateral play in the spindle, so that horrible last option could be the case, but at least a re-con turbo is only £325 on eBay, not too bad. Hopefully it's the first option and dropping some oil back out of this thing could cut the leak right back. Oil getting into my inlet is not good news for a diesel though and I could end up with my engine running on its own oil and unable to turn off, at which point I hope there is enough room in the traffic to stall the motor out!

My plan of action is thus:
  • Drain 2 litres of oil back out. [I can always put more back in.]
  • Watch for blue-smoke developing. [None as yet, but a bit of white smoke on startup.]
  • Get someone at work to check play in the turbo-spindle. [They say it's passable and a leaky turbo would give bad smoke, a broken one would be noticeable.]
  • Replace CCV [crankcase-ventilator]. [eBay £37.50 delivered.]
  • Replace oil-filter. [Euro Car Parts £5.99.]
  • Replace copper-washers on turbo oil-feed pipe.
  • Replace turbo... gulp.

E60: Removing Acoustic Engine-Covers for 6-Cyl. Diesels [525d, 530d, 535d]

Engine Acoustic Covers:

1. Remove the five screws holding the main engine-cover using a 5mm allen-key or male-hex socket and lift it off. The screws are located one either side at the front and rear and the fifth next to the PAS fluid cap.


2. Remove the left and right pollen-filter from the plastic panels by popping off the metal-clip and undoing the plastic nut with the arrow a 1/4 turn using a 13mm socket.

3. Disconnect the wiring connector for the 'bonnet-open' switch, located on the left hand plastic heater-duct in front of the pollen-filter.

4. Remove the left and right plastic air-duct panels from the back of the engine-bay under the windscreen by undoing the plastic nuts with the arrow a 1/4 turn using a 13mm socket. The nuts are located one either side under the pollen-filter and one in the middle joining both panels.


5. Remove the strut-brace by undoing the bolt holding on either side holding it to the suspension turrets and the two in the middle using an E12 double-hex or star socket.


6. Remove the two screws holding the rear engine-cover, one either side, using a 5mm male-hex socket or Allen-key and lift it off.


Air-box Housing / Air-Filter Inlet:

Saturday 26 July 2014

E60: Engine Rebuild 4 - Replacing Pistons, the easiest way.

EDITED August 2015:

** I never completed this job as I ended up replacing the entire engine, but did get pretty involved in it and thought I'd somewhat finish the guide anyway. **

If you're only replacing one or two pistons then the engine does not need to come out and the crank can stay on, but this is still a hardcore task. Still, I was determined to replace two of mine this way until a crack in the timing-case and other issues made me swap the engine, which was a lot more work and cost. Pistons are about £250 each new, but with 2nd-hand ones and new rings you could probably replace two for about £300, including gaskets and fluids. 

The biggest problem with accessing the bottom-end of the E60 engine is that the sump is an all-cast-alloy design that sits very snugly into the power-steering rack and front subframe. It also bolts completely to the gearbox bell-housing at one end. You will need an engine-crane to lift and support the engine an inch, then a bit of guts to unbolt and lower the subframe with the engine hanging precariously above you, so if this is beyond what you think you can do then it's time to bung the car over to someone with ramps, as you cannot get the sump off without doing it.

This thread on Bimmer-Forums [http://www.bimmerforums.co.uk/forum/f15/2003-e60-530d-whats-secret-getting-sump-off-please-t109192/] puts the process of trying to get the sump off without all the effort, then realising it is essential, quite succinctly and was a huge help for me.

You will need:
  • Ramps
  • Engine crane
  • 1 or 2 Trolley jacks
  • 1 or 2 spare Axle stands

You will need to remove:
  • Cylinder head etc. [See this post].
  • Engine under-trays and metal reinforcer-plate.
  • Prop-shaft at gearbox end.
  • Exhaust from back of turbo.
  • Turbo hosing.
  • Engine-mount top nuts.
  • Front anti roll-bar centre-mounts.

Basic Process:
  • Suspend the engine so the front is raised about one inch.
  • Remove all the screws holding the sump to the block and the gearbox-housing.
  • Unbolt the front subframe, the one the engine mounts sit on. The rear two bolts may not need fully removing.
  • Have someone pry down the subframe and work the sump out from the rear of the engine.
  • Bolt the sub-frame back up.
  • Lower the engine back onto the mounts.
  • Remove the bottom-end guard.
  • Remove the big-end from the affected piston.
  • Use a wooden drift to knock the piston(s) out of the top of the block.
  • Fit the new piston(s) and repeat the process to refit the sump.
** As I say, I did not complete this job. I lifted the engine and lowered the subframe a bit, but could not get the sump out first try. A second try never came before I decided to engine swap, though I'm sure it would have come out. Refer to the thread linked above for far better instruction. **

Thursday 24 July 2014

E60: Engine Rebuild 3 - Camshafts + Re-Timing - ghetto style...

When it came to re-timing the engine I realised that the crank could still no longer be turned by hand in order to get the engine to TDC [top-dead-centre], so the cams would need resetting to the same position they were in when the chain was removed. Rather than begin lengthy calculations based on piston-height in the block, I just copied the camshaft positions from the photos I took when taking the engine apart. Naturally I'd rather get the engine to TDC and have a proper look at the cam positions, but for now it's running great and I couldn't say timing was too far out or it wouldn't even start.


You do not need any gazillion £ special tools for this and, provided you've only had the head off and not removed the chain completely, then the lower tensioner will keep the chain in place on the bottom cog-wheel and there is no need to remove the radiator / belt / pulleys etc.

You will need:
  • T30 Torx socket.
  • T50 Torx socket.
  • E14 double-hex socket.
  • Accurate smaller torque-wrench.
  • Mole grips / vise-grips.
  • Large adjustable-spanner.
1. Drop the valve-guides and rockers into the head. It's best they go back into the same ports as they were removed from, even if it's a different head.

2. Oil the camshaft-bearings and drop in the camshafts, E = inlet, A = Auspuff / exhaust [not E for exhaust!].

3. Oil the cap-caps and drop them on in the correct positions numbered 1-7 from front to back.

4. Screw the camshaft-bolts down so there is no play in the caps, but not tight, then tighten them to the correct torque in half-turns only from the middle outwards. Torque is 10nm for M6, 15nm for M7 and 20nm for M8. Most if not all 03-09 330d / 530d etc. should have M7 bolts installed.

5. Use a large adjustable spanner to rotate the exhaust camshaft [A] to the correct position, using the section near the front where the shaft is cut into a hex shape, and apply mole grips to the camshaft so that they are lying flat to the head at the correct cam position, holding the shaft in position.

6. Install the exhaust-camshaft gearwheel, along with the vac-pump sprocket and do up to the correct torque of 30nm and 50 degrees. Try to get the sprocket into as close a position as possible to where the vac-pump was when it was removed.

7. Using the large adjustable-spanner, rotate the inlet-camshaft [E] into the desired position and either get someone to hold it in place for a minute, or apply a second set of mole-grips.

8. Refit the tensioning-rail into the chain. [The left-hand one looking from front.]

9. Roll the chain back onto the top cog-wheel and refit the inlet-gearwheel / cog-wheel / chain to the inlet-camshaft, tightening it to the correct torque of 30nm and 50 degrees. The exhaust-camshaft should now be holding the inlet camshaft in position.

10. Refit the guide-rail to the chain. [Right-hand one looking from front.]

11. Remove the pin holding the chain-tensioner [from this guide] and refit the plug.

12. Release the mole-grips holding the camshafts and you are ready to go!

Wednesday 23 July 2014

E60: Engine Rebuild 2 - Mashed up piston re-grind - ghetto style...

Bits of swirl-flap doing the skinhead moon stomp inside your cylinder is not good. It batters the top of the combustion-chamber in the head and the piston-crown good style, though in most cases won't score the cylinder-wall bad enough to need honing or re-lining. I went and swapped in a re-con cylinder-head as mine needed too much work, but the piston was a bit more of a head-wreck.

Firstly it's quite difficult to find spurious or 2nd-hand single pistons. There are plenty of other pistons on eBay, so I guess it's just waiting for an M57N to come up, otherwise it's over to BMW themselves who will charge about £250 for the part. It doesn't just double the cost of the job, but doubles the work too - the plastic and metal under-trays need to come off, along with cross-members and engine-mounts, the gearbox needs supporting, then the sump comes off and the big-end shells, finally the piston is knocked out of the top of the block with a hammer and block of wood.

I was working on gravel and moving the car onto ramps was out of the question, so in the end I went cowboy style and reground the damaged piston-crown while it was still in the block. Using a die-grinder I leant into the cylinder and remove as much of the sharp metal protrusions as possible, getting it pretty flat for the most part, but the worst bits are at least rounded into small bumps, rather than spikes that could break off and do more damage. I can't imagine combustion is as good as before, but as long as it compresses then I doubt any difference will be noticeable.


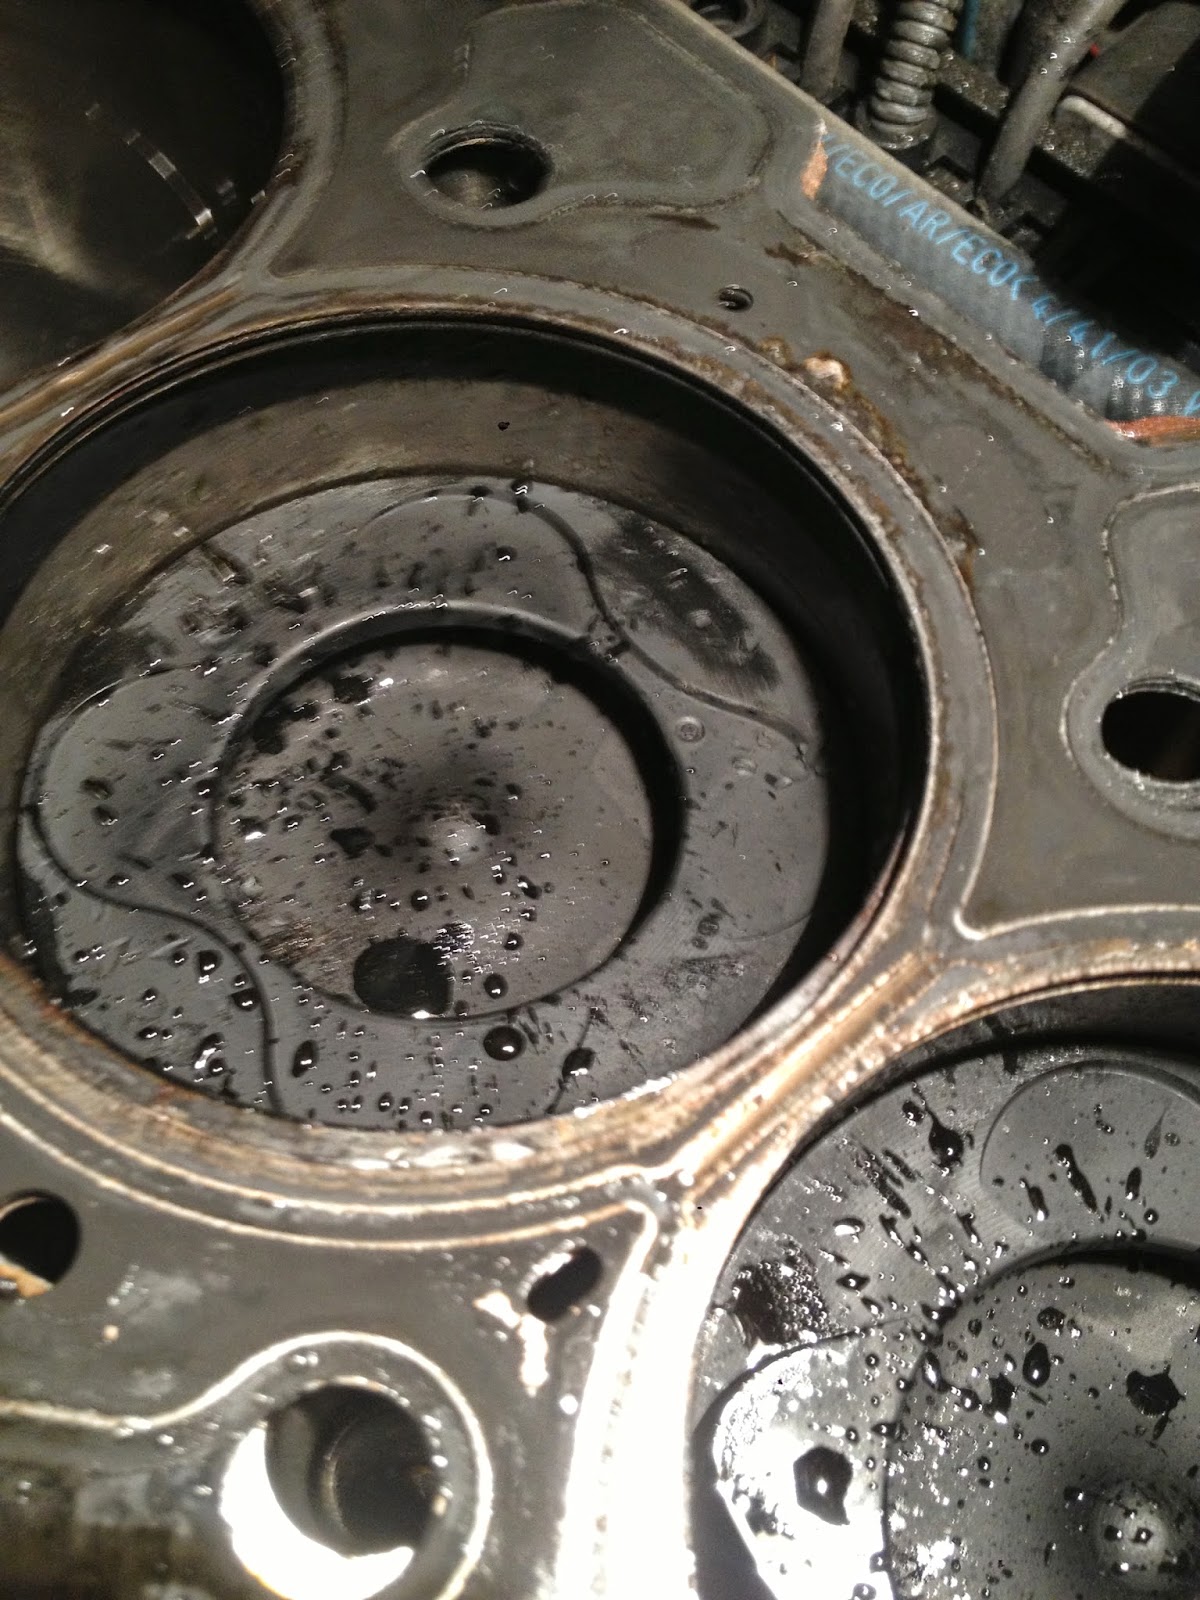
PIston 4, second from bottom, took a few valve strikes, worse on the exhaust side and needed a little bit of grinding left and right. At the top of the piston in the pic it seems a few bits of swirl flap did some damage, however the lower side is totally clear. I seriously doubt any performance will be lost on this cylinder.
Piston 6 took the brunt of the swirl-flap and was entirely covered in sharp peaks. The top and bottom faces came flat again with a few hours spent grinding, but the left and right really needed some work. About 5 hours spent in total leaning right into the engine and holding a steady hand and still its like the surface of the moon, but better than all that work to remove the piston and all 6 cylinders appear to firing great after 50 miles.

Tuesday 22 July 2014

E60: Engine Rebuild 1

This was complicated, but a totally realistic DIY job if you have the time. It is a lot easier than it has to be by 3 factors:
  1. No need to remove the front-bumper, radiator, aux. belt and pulleys as chain is not replaced.
  2. No need to fully retime as lower tensioner keeps chain on lower cog even though upper-cog is removed, pump chain is separate.
  3. Obtaining a 17mm allen-key type socket to undo a front-plug and access the chain-tensioner. This is actually the only 'special tool' you need.
Hand-ground pistons and block get a final clean before new gasket is put on.
Recon head from a twin-turbo X6 diesel mates up with new Febi head-bolts and crazy torquing sequence.
Once the front plug (where the allen-key is sticking out under the belt) is removed with a 17mm male-hex (allen-key type) socket, the tensioner can be accessed. A 10mm nut below the tensioner is released to free oil-pressure, then the plunger can be pushed all the way back and a pin inserted to hold it in place - the 3mm allen-key in the picture worked for me. The oil-pressure nut is retightened after the chain is back on and the tensioner released.

Unable to turn the engine, camshafts had to be positioned by eye based on photos of before the chain was removed.
Nice dollop of fresh oil on the rockers / guides / bearings and caps.

Rocker-cover is the most involved part of the job as all the injectors / fuel pipes plumb into it.


Monday 21 July 2014

E60 Engine Rebuild: New Cylinder Head from an X6 and other bits.

Went down to see my head on Thursday, the guys at Birkenhead Engines say it needs 2 new seats pressing in and 4 new valves, plus all the grind-work. The valve-seats on the exhaust side are pretty gouged, so I opted for the replacement head for £225 after all so I could get stuck in to the job this weekend. It's from an X6 apparently, the engine-code sticker says M57NTUE2, so it's from a twin-turbo of some sort and less than 5 years old, which is nice. It bolted straight on and, although it has definitely had a skim done, the bloke assured me it would take a 1-hole gasket.

£200 for the head and £25 to have my glow-plugs / sensors switched over and to have one of my cam-caps machines to match this head as one had gone missing. I gave them all 14 of my cam-caps and they found the best match before checking my original camshafts were aligned. Birkenhead Engines FTW.
M57NTUE2 means its a 'Twin-Power' engine model and was built since 2009.
Skimmed face was apparently done 'very lightly' so as not to hit the Stellite valve-seats and still takes a 1-hole head-gasket I am thoroughly assured.


Sunday 20 July 2014

E46: Inlet full of oil! Re-con time.

Removed the inlet-manifold to check the CCV [crankcase-ventilator], crankshaft-sensor and main wiring-loom / connections. It didn't look too bad underneath, though there are some signs of a stuck CCV valve. I put the manifold down next to the car while I was working and after 5 minutes I noticed a large pool of dirty oil had run out of the throttle-body, so I placed that end in a bowl, jammed the butterfly open and leant the manifold on its end. Another 1/4 pint of oil ran out of it and today I removed the throttle-body entirely and managed to get about half as much again. More is coming, so I've blasted carb-cleaner back through the inlet-ports and left it to run down.


So either the piston-rings are completely shot and are leaking that much oil back up into the inlet, in which case the engine wouldn't run... or it's one heck of a stuck CCV. In this case, it would appear the crankcase-vent valve has stuck closed, which is allowing pressure to build up and pump oil back through the clean side of the CCV-system, dumping it right into the top of the throttle-body! Rather than creating a vacuum in the air-inlet that keeps the car at a decent idle, the CCV is pumping combustion pressure instead and covering all the sensors with hot oil. Not good. This is the most poorly engine I've ever seen.

While the throttle-body is off I may as well give it a good clean, along with all the sensors that had filled up to the wiring-connector with the pressurised oil. Even if this doesn't completely clear the rough running faults, it has certainly given the engine a new lease of like and it never does any harm to flush everything out and eliminate any further problems in the inlet.

E46: Brakes + oil leak sorted - still running rough!

Wednesday 16/7/14:

Replaced vacuum-pump.
Replaced both camshaft-sensors.
Replaced MAF sensor.

Well, I'm certainly glad to report that the oil gushing onto the exhaust / cat has stopped with the replacement of the blown up vac-pump and I now have good pedal feel and stoppage. Sadly, even the return of some vacuum isn't enough to cure the low-idle and rough running. I replaced the obvious things, both cam sensors and the mass-airflow meter, but this hasn't sorted it either. I'm guessing there is either a severe vacuum / vent problem, or it's going to be to g related... Oh joy!

The diagnosis will go as follows:

Remove and fully check out inlet manifold.
Thoroughly check all CCV lines and the valve.
Clean and check all electrical connections.
Test for compression.
Move on to timing.

Other jobs:

Adjust handbrake and refit discs.
Fibreglass fill n/s/r wheel arch.
Check squeaky ABS sensor.

Saturday 19 July 2014

E60 530d: Swirl-Flap Blanking Plates

If you have a BMW with swirl-flaps, get them out ASAP. We all hear horror stories about swirl-flap failure and just how bad they are, but I had no idea they can wreck your engine so quickly and overlooked the advice. This I have lived to regret, as have a thousand others. Just one flap breaking loose, as in my case, and being sucked into the engine does all that damage. Do yourself a favour if you have 100k on the clock and fit blanking plates. Some say the engine won't run properly without the flaps, but I am assured it will and for a lot longer. All the swirl-flap is designed to do is to dump air into the engine when the inlet-pressure is reduced and soot would normally be dominant. In other words, it reduces the little puffs of black smoke on harsh gear changes. The car will still pass MOT and won't use any extra fuel.

I got some aluminium ones off eBay, they were £20.99 delivered for a set of 6, sets of 4 are even less.

My late-2003 M57N 530d has the earlier 22mm swirl-flaps and so should most 4 and 6 cylinder diesels up to about 2006. Revised M57N should have the beefier 33mm flaps, but after 2010 the swirl-flaps are removed from the inlet and redesigned entirely. Hmm, I'm amazed it took them so long. The actual specific size of swirl-flaps in BMW diesels from 2003-2010 varies wildly it would seem, so the only way to know for sure which ones you have before buying is to remove the inlet-manifold and measure them.

SIZE refers to the diameter of the hole that the swirl-flap fits into, not the length of the flap in the inlet port!


FITMENT:

1. Remove inlet-manifold.
2. Remove the two screws holding the swirl-flap diaphragm on the underside of the manifold using a T20 Torx socket.
3. Slide the metal-rod clear of the swirl-flap levers and remove it with the diaphragm.
4. Remove the two screws holding each swirl-flap in place using a T20 Torx socket.
5. Remove the swirl-flaps by prising either side evenly with a flat-screwdriver until it pops from the seal and can be lifted out.
6. Fit the swirl flap blanks into the holes and pop them down into the seal - they should self-align.
7. Replace the twelve T20 Torx screws to the blanking-plates.
8. Unfasten the extended part of the lever-arm that joins the swirl-flap diaphragm to the metal rod and remove it along with the rod.
9. Refit the diaphragm to the inlet-manifold with the two T20 Torx screws.
10. Replace inlet-manifold.


Friday 18 July 2014

The curse continues! 318ti blown head gasket! [E36K]

I don't believe this! Nathan has been using his E36 Compact for work this week while the wheels are off the 330 Clubsport. Yep, the same E36 I was about to borrow so I can get to work with the broken E46 and E60. It's been running like a dream while it's for sale, then this morning he gets 2 miles and the head gasket blows, then he runs round and dries home like a red arrows display, so it looks water related... why? its not like he was ragging it in eco mode. Drat!

It has a minor running fault as it is, where the engine cut out when the auto-box is put in 'D', probably the torque-converter. This I could have lived with, even the 'sport-o-matic' box, but more open-engine is out of the question I'm sure anyone would agree!

3 dead Beemers in 3 weeks! What is going on.

Thursday 17 July 2014

E46 318ci: The Beemer that chose me...

This is my new E46 coupe. I didn't intend to buy it, or even own it. It's a 51-plate 318ci SE with 133k on the clock. I have been seriously hankering after an E46, but this wasn't quite the Beemer switch I was after. The intention was to split it for parts... But once I've walked past it a couple of times on my drive I naturally realised it needed my help and decided to 'av a little go. It's turned into Beemer love beyond Beemer love...

Synopsis:
  • No front bumper.
  • Hole drilled in petrol-tank.
  • No brake assistance whatsoever.
  • Sticking calipers.
  • Rotten wheel-arches.
  • No driver's door-card, so no handle, speaker etc!
  • No battery.
  • Runs... Just.

Monday 14 July 2014

E46: Vacuum-pump severe failure...

With a new servo and master-cylinder, but still no brake assistance, I decided the vacuum-pump must be leaking air. I whipped it off, only 3 bolts and no need to remove rocker-cover etc., and opened it up. This is what I found...

This chamber should be full of air, not oil. The pump bolts on to the back end of one camshaft, which turns a spinning-boss. A plastic-bar slides up and down in the spinning-boss and creates a constant vacuum into the servo to help 'suck' the brake-pedal down when you brake. My plastic bar is missing. Where is it? Well, it's smashed into pieces lying in the oil.
After a clean up it was a decent pump-body and would work fine with a new O-ring and plastic-bar. They sell O-ring kits for the N42 vac-pump separately, but plastic-bars they do not, so I bought the pump from the same donor car as the servo + M/C. All pieces seem to have sheared off with a clean break, the bar was literally blown apart, except for one of the round end-caps (the tiny piece in the middle of the pile in the photo). That had been spread into thin strips as it broke off, so it looks like that end contacted the side of the case, spread into fronds and jammed the plastic-bar, which promptly blew up. How though? Did the timing slip unbalance the camshaft enough to wreck the pump? Or did the plastic-bar break apart and jam the pump, causing the camshaft to stop briefly and the timing to slip in the first place? Hmm...
Another side effect of the vac-pump failing was a terrific oil leak. The O-ring seal had gone completely and the spinning-boss was acting like a mini oil-pump, sending a constant stream down the back of the head onto the hot exhaust [bottom of the pic]. The pressure also made the vacuum-hose connector, normally only filled with air, to leak at the jubilee clip and pour oil onto the gearbox-housing [middle of pic]. After removing the pump a huge third pool of oil arrived. This was what had run out of the vacuum-hose to the brake-servo after disconnecting.

Saturday 12 July 2014

E46 318ci: Total Jobs Checklist.

Sat 6.7.15:

6 months tax.
2 new front tyres.
4 new brake discs.
New master-cyl. / servo.
Fuel tank repair.
Replacement front bumper.

Sat 12.7.14:
  • Re-bled brakes.
  • Wynn's Engine Stop-Leak and half a litre oil.
  • Rad-hose repair-tape kit, cable-tie out of way, 1 litre water/coolant.
  • Cleaned wiring-connectors to cam-sensors.
  • Cleared all oil residue from exhaust-manifold.

Quick run of engine with NO MAF connected gives improved idle-speed of 900rpm. After revving, it drops below 900 for a moment, then returns to 900.

Brakes are bled and still very stiff. No servo assistance is present, but the servo and m/c are known to be working. Could the problem be the vacuum pump? Could this be causing the oil leak?

If not, then it feels a little too low for the rocker-cover and will most likely be coming from the rear main-seal, which is a gearbox off job, so lets hope its just draining from one of the rear rocker-cover plugs and running down the head.

Tues 15.7.14:

Replace vacuum-pump.
Replace both camshaft-sensors.
Replace MAF sensor.
Remove inlet-manifold to check CCV and crank-sensor.
Clean oil and recondition inlet-manifold.

E60: Engine Autopsy Verdict.

Well, contrary to my earlier verdict of no damage to the head, a bit of informed explanation reveals the corroded surfaces in cyl. 6 are in fact battered metal from the where bits of my swirl flap were bouncing around inside it. Not good!

After having my photos pored over by the engine diagnosis experts on BMW Land, the best version of events of that fateful Tuesday are below:

1. Swirl flap no. 4 breaks up and bits enter cyl. 4.
2. Inlet valves jamming open on cyl. 4 cause a backfire and blasts the loose remains of the swirl flap into the intake plenum.
3. The turbo forces the swirl flap remains along the plenum, with bits ending up in cyl. 5 and the majority entering cyl. 6.
4. Cylinders 4 and 5 continue to fire with slight lack of compression.
5. Trapped debris in cyl. 6 begins to ricochet around, causing damage to the alloy piston-crown and the top of the combustion-chamber in the head until the inlet valves cannot close fully and compression is lost entirely.

Worst bits:

  • Cylinder-head is finished. Valve-ports on cyl. 4, 5 and 6 need regrinding and fitting with some new valves. The top of the combustion chamber in cyl. 6 needs completely regrinding into shape.
Best bit:
  • The engine still turns freely, cyl. 4 and 5 are virtually damage free and do not need replacing.
  • Piston 6 compresses in the block still, so no damage to piston-rings.
  • There is no damage or scoring to the cylinder walls.

THE REPAIR [in theory...]
  • Repairing the head will cost ~£350, the cheapest Birkenhead-Engines can do and may still need further work, so a replacement is needed. Birkenhead-Engines say they have one such in stock, removed from another E60 530d, though what year they are unsure. It is not re-con and they say I can take my chances for a mere £200, but at least they know the valves etc. all work so it looks like this is the way to go.
  • As long as I remove any tiny debris from cyls. 4 and 5, I am happy that they are working 99% as well as they should and do not need any repair.
  • Cyl. 6 is battered and, although it is compressing in the block, the jagged metal crown will mess up proper combustion even if it fires ok. Worse, bits of the jagged alloy will probably break off during combustion and ping around the cylinder some more, potentially messing up the valves again so really the piston needs replacing.
  • Not only is finding a single replacement piston very difficult, the job to replace it requires removal of the sump and big-end shell. This, with all the under-trays and cross-members is a colossal task in itself and, with the car parked on loose gravel, it's looking like a no-go.
  • The short-cut solution to piston-6 looks like it's going to be a jenky regrind with the piston still in the engine. I will turn the crank by hand so that piston-6 is in its topmost position and get in there with a die-grinder, removing all the proud bits of metal and re-shaping the 'swirl-pot' and piston-crown as well can be. This ultimate bodge could be the end of a relatively unscathed engine. It could also be the only way to get the E60 back on the road quickly and with a minimum of fuss... Fingers crossed.
COST:
  • Replacement cylinder-head: £225. [Birkenhead Engines]
  • New head-gasket: £85.55. [Euro Car Parts]
  • New head-bolts: £37.48. [eBay: dusty789blue]
  • Swirl-Flap Blanking Plates: £20.99. [eBay: myldanautodesignltd]
  • New thermostat: £33.99. [I broke the housing - Ebay: carpartssaver]
  • Oil: £85.98. [Halfords, own-brand BMW Fully Syn. 5w30]
  • Coolant: £22.99. [Halfords, Comma G48]
TOTAL: £511.98.

Tuesday 8 July 2014

E46 318ci Brakes Checklist

Calipers pushing back fine, hoses not collapsed or clogged.

No fluid coming out of master cylinder itself, so brake pipes not clogged.

Fluid drains from the master-cylinder from the spout that joins to the hose that runs to the servo-housing.

Master cylinder no pressure? No visible leak.

Servo stopping master-cylinder from pressurising?

Pedal not operating?!


Sunday 6 July 2014

E60: 530d Engine-Death Post-Mortem:

Had the rough-running / misfire from the vid in this thread [], so I've quickly whipped the cyl-head off [lol!] and this is what I found...No. 4 swirl-flap has broken off and is missing from inlet-manifold. Some technician could have removed or broken this with the mani. off in the past, but this is unlikely so it looks to have been chewed by the engine. With all that intake-pressure it's possible the skinny flap has been totally disintegrated by the valves / piston and blown through the exhaust in tiny pieces...
  Image resized to 50% of its originalize [1600 x 1200] Image

...because there is no sign of it in the head, or inside cyl. 4 / the exhaust manifold. The turbo is spinning great and there is no play in the spindle. You would imagine the flap getting stud behind the inlet-valves, right down the inlet-port, but there is just no sign of it. I got the inlet valves down using a home-made valve-spring compressor, built from a piece of angle-iron and an M10 nut/bolt and sent pipe cleaners through. There is no obstruction in the head at all. Ima
 resized to 37% of its original size [1200 x 1600] Image

Slight marking on piston 4 suggest the flap has been mashed through the cylinder, or that the inlet-valves have gingerly contacted the piston while that was going on.
  Image resized to 37% of its original size [1200 x 1600] Image

In the block, cylinders 1-3 appear to be working perfectly. All cylinders are in the right position and the engine was running [badly] so there is no seizing. Cylinder 4 appears to be firing correctly, despite the marking to piston-top. Cylinder 5 appears to be firing ok, but there was a small pool of neat diesel in it. This may have just spilled over from cyl. 6 when the head was removed, as 5 appears to be firing. 
Image resized to 50% of its original size [1600 x 1200]
Image

Cylinder 6 was full of neat diesel to the brim. There was no sign of 'hydro-locking' or the neat fuel affecting the crank, so it seems to have been gushing straight into the turbo/exhaust. Exhaust-port 6 on the head is wet / oily with diesel, whereas the other 5 are bone dry and sooty, so it looks like only cyl. 6 was in fact not firing.
Image resized to 50% of its original size [1600 x 1200]
Image

The top of piston 6 is quite badly corroded, as is the top of the combustion chamber in the head around the valves. I wonder if excessive fuel from a leaking injector could cause this?
Image resized to 50% of its original size [1600 x 1200]
Image
Image resized to 52% of its original size [885 x 1143]
Image

Injector 6 appears fine [as is always the case].
Image resized to 50% of its original size [1600 x 1200]
Image

There is no sign of damage to the head, cams, block, manifold and turbo, so I have to give the head a clean bill of health and will be putting it back on. New gasket is £80-£120 on its own!

No loss of compression on cyl. 6 or damage to head-gasket. 

My best guess is that as exh. port 6 on the head is wet with fuel, no. 6 injector has flopped it in a big way and been flooding the back cylinder with fuel and not firing, which could still explain the sudden nature of the fault.

If this not the case, then I can only imagine the dropping swirl-flap has caused untold damage to the engine, knocked the timing out somehow affecting only cyl. 6 completely, but 4 and 5 to fire improperly too.

Yeah, so looking like a truly broken injector then! Guess I will be replacing all 6 when I refit, about £40 each, along with some swirl-flap blanking-plates for £7.50. I also broke the thermostat-housing as I removed the feed-hose, so that's another £40 down the drain, oh and more oil and coolant of course. Think I'll re-use the head-bolts!

Saturday 5 July 2014

E60 is dead. Swirl flap!! Why?! Why didn't I remove them?!

Yes, it's happened. Owning an E60 wouldn't be complete without it... No. 4 swirl flap has broken and been sucked headlong into the engine!

This is the start of a big thread I can tell...

I pulled away in 2nd on my way home and the engine let out an almighty clunk and then started to sound very dead. I managed to get home on 3 of the 6 cylinders [duh duh duh, duh duh duh :)], but the lump is finished. Spent Thursday and Friday nights ripping the cylinder-head off it and the result is not good. The inlet valves on cyl-4 are stuck and the swirl-flap has been sucked so far into the head that I can't reach it unless I drop the valves out. That sounds like a job for someone else... As for the block, cylinders 5 and 6 are full, literally FULL of neat diesel. Ooh dear.

I started this thread on BMW Land - E60 530d sudden rough running / misfire? - with the verdict of swirl-flap or injector, but now I've thrown some pics up of the cylinders peeps have gone a bit quiet. I will have to do an engine post-mortem.


It is now I should mention I have recently got hold of a 51-plate E46 318ci, which I will detail a bit in another post as it really in bad shape. This thing was going to the crusher and I saved it saying I could use parts off it, the wheels alone are 17" MV2 copies and they're worth at least a ton. The owner just gave me the car for free and said I'd done him a favour. Once I got it home I found it to be running fine! The running gear and suspension is also in good shape, it just had seized brakes. I started re-conning the callipers, fitted 4 new discs and bought a second-hand master-cylinder as the old one was just pumping air and air alone. With this little lot on there is brake-pressure, but now I can't bleed them as the nipples are well seized!

What a difference 7 days can make! Now I'm stuck with a road-legal, but completely dead 5-series and a running 3-series with no tax. If I can get the nipples off this E46 then I will throw 6-months tax on and start using it, but really, this was not the Beemer switch I had in mind!