Showing posts with label DIS. Show all posts

Sunday, 18 November 2018

BMW DIS v57 User Manual + SSS v32 User Manual [PDF]

DIS v57 User Manual:
https://drive.google.com/open?id=1vU8q_xrf3ZOAUQjagdpPx_t9kvyq__fg


SSS v32 User Manual:
https://drive.google.com/open?id=11HU6YZPBURp7E1gr0c8uPdBlGndgI5vV

Sunday, 11 November 2018

Modify BMW USB-OBD Cable for 2005 and Later Cars

If you have an older USB-OBD diagnostic cable that works with BMWs up to 2005 [DIS v44 etc.] then it will need modifying to use with later cars and version of DIS / INPA etc. The process it pretty easy.

1. Remove the four screws from the OBD section of the cable using a crosshead-screwdriver.

2. The case will likely be glued together, so pry it open with a flat-screwdriver and remove the circuit-board.

3. Locate pins 7 and 8 on the back of the OBD-plug itself, which you will find bridged by a blob of solder. [Usually the right-side two pins looking at the face of the board with the LED on.]


4. Use a soldering iron to melt the solder between the two pins so they are no longer linked. [A solder-sucking device is useful here, but it can be pulled off onto the soldering-iron quite easily.]


5. Re-assemble circuit-board in casing and replace screws.

The cable will now work 2005 and later BMW cars, including newer models for all diagnostics using this interface, inc. DIS v55, v57, INPA 6.4.3 etc.

The cable will no longer work with BMWs made before 2005 and DIS v44, so it might be worth getting a spare cable to de-solder. The ideal solution is to solder small wires to each pin that run off to a switch mounted in the edge of the casing. cn555ic has done a very good guide on how to do this on E90post.com - https://www.e90post.com/forums/showthread.php?t=672940.


Sunday, 4 November 2018

DIS v57 + INPA / EDIABAS 6.4.3 Installation + Guide

Download Links [MediaFire]:

BMW INPA / EDIABAS 6.4.3 + Install Files etc. [1.1GB]

BMW DIS v57 / SSS v32 Installer Files [6.7GB]

**You will need BOTH parts to fully install DIS v57**

You will need a laptop with USB running Windows XP or Windows 7.

You will need a USB-OBD cable optimised for post-2005 BMWs. An older cable can be modified by removing the solder-bridge between OBD pins 7 and 8 - a guide is here.

GUIDE:

Unpacking Files:
  • Unpack the 2 .rar files into a new folder.
  • Where the contained instruction file mentions unpacking files from CD1 and CD2, all the .rar files for both CDs are contained in the one 6.7GB download.  
Installation:
  • If upgrading from DIS v44, install the files into the same folder and overwrite existing files.
  • The instructions cover Windows XP, but files for Windows 7 and 64-bit, along with instructions for that are provided in a folder marked OTHER.
Further installation and troubleshooting instructions [getting the virtual machine / network bridge / ports etc. working] can be found in my prior DIS v44 guide: HERE.


Saturday, 3 October 2015

E53 X5: 3.0D get on to DIS!

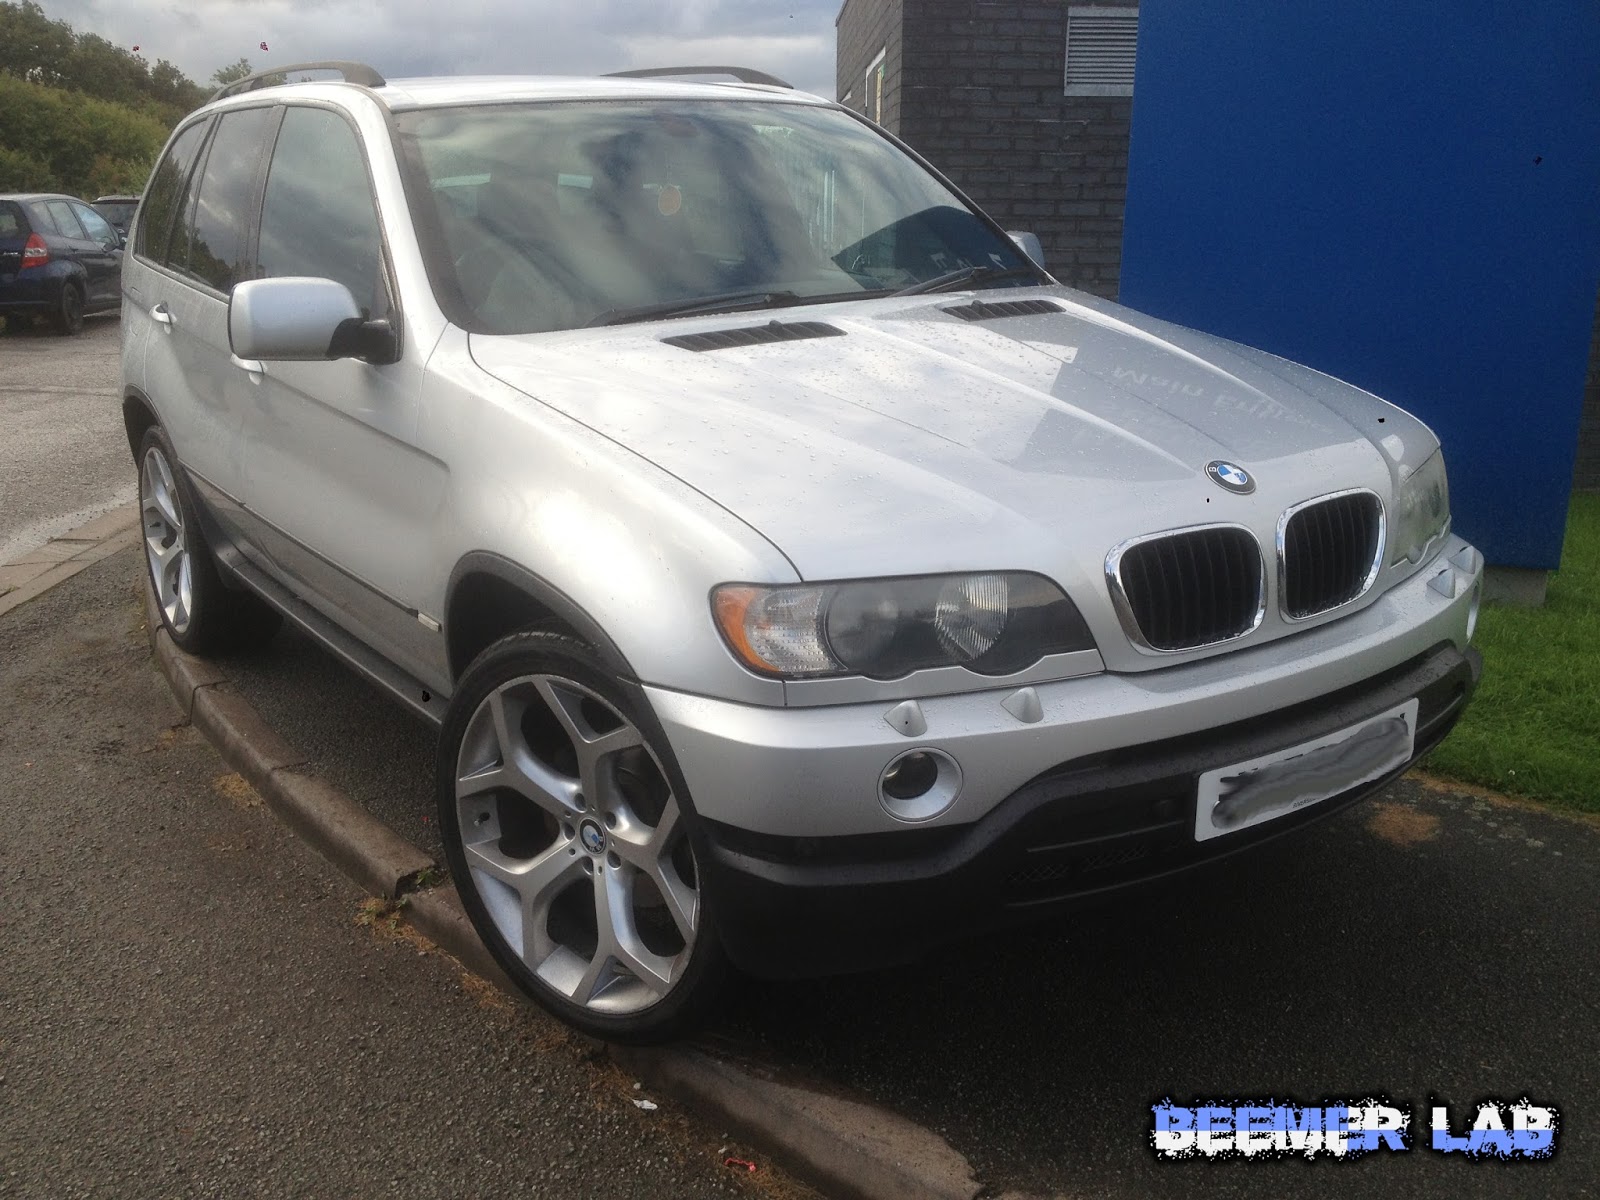
Had the keys to a nice 52-plate X5 belonging to an X-colleague, actually Ant brought it into work for us to diagnose and it is fly as heck with 22s from an X6.

It's been struggling to start, particularly when warm, so our first guess was a dodgy cam or crank sensor. An independent BMW garage had already said it was the starter-motor solenoid, but we couldn't see this being right as the starter is turning fine, the engine just doesn't fire for a while.

I plugged it into DIS and here is what came up:

120001 General malfunction at engine.
120002 No engine start possible.

A test-plan of 120001 showed up the two DDE error codes - 

09F6 Fuel rail-pressure monitoring, where the pressure was too low. This tends to come up when the engine isn't firing anyway and is unlikely the cause of it. There is a chance that rail-pressure is low enough to not start the engine, but no cutting out or lack of power issues are reported.

3505 Glow-plug system. This turned out to be related to the glow-plug circuit rather than the plugs themselves and was no present when tested, quite normal for a 99k M57.


A test-plan of 120002 did not mention the DDE issues and offered several explanations for the non-starting, these included -

Starter / Ignition Circuit - Fault not currently present. The starter is also turning fine.

Immobiliser fault in key - Not currently present and nothing found when DIS ran a test.

Gear-select Park switch - This only affects automatic boxes, which need to be started in P. It couldn't be this as the starter is turning and that would lurch the car forward anyway if it were in Drive. We ran a test anyway and it worked perfectly.


So we are none the wiser really. The only short-term suggestions are to try the spare key and see if that starts it quicker, though this is a long shot, and to hold the key in ignition position 2 for a while before trying to start the engine. If the latter works then it suggests a fuel-pump going dodgy, we will have to wait and see. I deleted the fault-codes so maybe Ant will being it back and get it on DIS again.

Other fault-codes that came up on DIS were:

EHC [Electronic Height Control] - 01 Ride-level sensor, left.
This is down to the whopping 22" wheels and tyres from a much newer X6 wreaking havoc with the complex suspension systems, so if your 5, 6, 7 or X Series has bigger wheels on then it will probably be throwing this up.

ZKE [Central body electronics] - 89 Central-locking drive, driver's door, open circuit.
This is an annoying one as it causes sudden loss of the driver's door controls, which come back t random. It also stops the door-lock activating from the button and makes the alarm go off when opened with the key. Hopefully it's a break in the wiring at the door-hinge and can be fixed easily, rather than something inside the dash.

SZM - 17 Undervoltage.
This refers to the Central switch center-module, which is working fine so who knows.

IHKA [Integrated automatic heating and air conditioning system- 1E Auxiliary-water pump - Short circuit to positive.
This is  a pump on the cooling-system to aid the flow of hot water round the heater system. The BMW documentation describes its function as 'The ZWP enhances hot water flow (1 - outlet, 2 - inlet) and ensures the minimum flow rate, particularly when the engine is idling or off (residual heat function).'
The PDF of the BMW documentation covering the entire IHKA system is on BimmerFest here.

Sunday, 2 August 2015

E60: Glow plugs + control-module - time to sort this.

I mentioned the glow plugs in this post, but have had no change in the error codes coming up for all 6. These are the last remaining fault codes that have not been ironed out since February so I thought I'd get into it in more detail now I have DIS at my disposal, which finally threw up an error for the glow plug control-module [though it wouldn't say for sure], so it's almost certain this is the fault. I read a lot of people mentioning the 'relay' on forums, but this is referring to the same part.

The control-modue is about £75 on eBay for an OEM part made by Beru, which isn't too bad. The inlet-manifold will have to come off again so I am tempted to replace all 6 glow plugs at the same time just to make sure. I do, after all, have a M57NTU2 cylinder-head lying around with 6 nearly new plugs in so it won't cost anything and seems to be a no brainer, though I am terrified of one of the current plugs will break and get stuck in my good engine.

Diagnosis:
The original scan with Autocom CDP+ only showed errors for all six glow plugs [codes 4212, 4222, 4232, 4242, 4252, 4262]. All of them were intermittent and had failed at the same times, 31 out of 40 starts. I got INPA running, which is BMW only software and read the correct DDE version 5.x instead of the 6.x forced on me by Autocom and showed correct values for the injectors, yet it just showed the same errors for all 6 glow plugs.
When I eventually got DIS up and running it threw up a fault for the glow plug control-module itself [Glow control B1362_D5BSDGSG], but with no fault-code and even after running pre-heating tests on the glow plug system [battery float-charger came in handy here] it still could not say the control-module was
definitely faulty. Instead it suggested a 'break in all lines to heater-plugs', which is seriously unlikely and after checking them in May there was no sign of this at all; and a failure in the supply of voltage at Terminal 30. Terminal 30 it turns out just means constant battery power and I tested this at the control-module socket with a solid 12v, so it would seem beyond all logical doubt that the module itself is failing intermittently somehow.

Cause:
As for how the control-module could have failed is open to debate, as it was only removed from the old engine for a short time before being fitted to the new one, not moved around and stored. Its location, right under the coolant return hose from the head means water could have spilled over the control-module at some points during the swirl-flap repair and the constant 12v supply made the module live whenever the battery was connected. In fact, as I was in such a rush to get the head back off and find the oil leak [here] I ended up draining the coolant from the return hose first, rather than fully draining the coolant from the radiator. This allowed water/coolant to run down the right side of the engine and over the starter-motor, EGR-solenoid, glow-plug controller and main wiring junction-box, which by any account was a bad thing to do. Yet, had this shorted the live wire of the module or individual plugs to ground then it would only render them inoperable temporarily and not cause damage to the units themselves. If water had got inside the sealed module or caused some sort of overload, then that would have been pretty final and I can't see how the module would work at all after that.
Both the glow plugs and control-module are the same part number throughout the entire E60 and LCI range. The design was revised for the control-module in 2005 and this is the only part available now [12217801201] and replaces the old design [12217788327]. This is largely irrelevant anyway, as both my original and 2004 replacement engine share the old part.
It could simply be the sooty condition of the new engine when I first fitted it, too much entering the inlet, or just the age of the plugs that caused my original module to work harder than it's used to and start to fail. Either way I will replace it in due course and hope it clears the 6 glow plug errors, as it has for most people on the forums.

Tuesday, 28 July 2015

DIS v44: Diesel Injector Coding / Programming Guide

If an injector is replaced it needs coding to the ECU. Once you know what to do, injector coding is a pretty quick and easy job, all 6 can be done in about 15-20 minutes. You will need a working install of DIS and EDIABAS, so a download and setup-guide is in this post. The code is 6 or 7 digits and printed on the top of each injector, more information in this post.


** Connect a float-charger to the battery before coding with DIS ** The process takes 10-20 minutes if all goes well, but it is not worth the risk of doing adjustments to the ECU without one.

1. Connect car to DIS and perform API test.
2. Click on 'Diagnosis'.
3. Select 'Series' and 'Model series', then click the forward arrow.
4. Click on 'Yes' to start the 'Short-test', wait a few minutes for it to complete and click the forward arrow.


5. Click on 'Function Selection'. (Bottom left.)
6. Select 'Service Functions'.
7. Select 'Drive'.
8. At EGS transmission control prompt, select 'No' if your car is manual, 'Yes' if automatic, and click OK.
9. Select 'Diesel Electronics'.
10. Select 'Adjustment Programs'.
11. Select 'Injector rate adjustment' so it is highlighted in black.
12. Click on 'Test Plan'. (Bottom centre.)


13. Check 'Injector rate adjustment Bxxxx_Dxxxxxx' is highlighted and click the forward arrow.


14. Wait for the fault memory to be read and at the 'Fault codes are stored...' prompt click the forward arrow.
15. Wait for the current calibration values to come up and click the forward arrow.


16. Select '1' (Enter new calibration values) and click the forward arrow.
17. Enter the number of the injector into the keypad to be re-calibrated and click the forward arrow.
18. Enter the new injector code into the keypad with no spaces and click the forward arrow.


19. If more than one injector needs coding, select 'Yes' to the prompt and click the forward arrow, then repeat the last 2 steps for each injector number. If not, select 'No' and click the forward arrow.
20. Select '2' (Save calibration values) and click the forward arrow.
21. Check the values are correct, select 'Yes' and click the forward arrow.


22. When the new values are displayed click the forward arrow.


23. Select '3' (End) and click the forward arrow.
24. When 'End service function' is displayed click the forward arrow.
25. Shut down DIS and disconnect the car.

http://www.instructables.com/id/BMW-Diesel-Injector-Coding-with-DIS-v44/

Saturday, 25 July 2015

Working DIS v44 Installation Simple Guide + Downloads

Here is a new post with a download and brief guide for DIS v57 / SSS v32 to work with BMW models up to 2010 and a newer version of INPA working with model up to 2013 - http://www.beemerlab.org/2018/11/dis-v57-inpa-ediabas-643-installation.html

Download Links [Dropbox]:

*EDIT 7 May 2018:
OK, thank you everyone who left a comment, I am glad so many people have found this guide helpful. Due to the high volume of traffic and unreliability of the DropBox links, I have finally added the files to MediaFire and Google Drive.

NEW USERS:
This is a guide on how to install DIS using the instructions that come in the .zip files, not a detailed guide. The complete procedure to install DIS is quite complicated and has so many variations that will end up with it not working or need the whole thing installing again to change, so follow through them as per the guide below and you should get it going, as many others have. 
Read the troubleshooting section at the bottom, particularly the first part. The Windows install on some laptops simply will not work with the virtual networking needed to set DIS up and/or routing of the COM ports, yet another laptop running the same Windows version will work fine. If you find yourself unable to complete the installation or connect the hardware as shown below after a few tries,  switch to another laptop or do a fresh install of Windows.


GUIDE:

You will need:
  1. A laptop running Windows, preferably XP SP2.
  2. A USB-OBD cable (or a serial-OBD cable if your laptop has a serial port).
  3. INPA / EDIABAS.
  4. VM Ware version 5.5 or later.
  5. EasyDIS.iso and DIS_v44_programs.iso.
  6. Diag Head Emulator.

Installation procedure that worked for me: [Obviously refer to the installation guides / videos for detailed instructions.]
  1. Disable Windows Firewall and Anti Virus.
  2. Install drivers for your USB-OBD cable and USB-serial adapter, making sure it is set as port COM1.
  3. Install / update INPA / EDIABAS, using ADS interface, not OBD.
  4. Change environment path in Windows to c:/ediabas/bin.
  5. Install ADS Setup.
  6. Install OBD setup.
  7. Edit ediabas.ini, change remote-host and port.
  8. Install VM Ware [version 5.5 or higher].
  9. Edit VM Ware network bridge in network editor.
  10. Set up the new virtual machine with ethernet set to the network bridge.
  11. Install Diag Head Emulator.
  12. Install easy_DIS and the DIS programs.
  13. Load DIS, open/run Diag Head and open IFHsrv32.exe.
  14. In DIS, enter Administration > Calibrating Touch Shield, change the processes to off and make sure it passes the API test.
  15. Enter Administration > Diagnostic Head, click on the IP-address / computer-name and click the OK button.
  16. Enter Administration > Connection Setup, click on the IP-address / computer-name and click Connecting. Once connected the IP-address should appear in the bottom right and both sets of lights are lit up.
  17. Go back into Administration > Calibrating Touch Shield, set the vm process back to off and change translator to Fister.
  18. Edit ediabas.ini again, changing the interface to STD:OBD instead of ADS.
To run DIS / test connection:
  1. Connect cable to OBD socket on car and turn ignition to phase-2.
  2. Load up INPA (.ipo), check the Battery and Ignition dots are black.
  3. Close INPA, but leave EDIABAS Server running in task-bar.
  4. Start DIS and wait for it to fully load.
  5. Load up Diag Head and click run.
  6. Load up IFHsrv32.exe.
  7. Enter Administration > Calibrating Touch Shield in DIS.
  8. Perform API-test, check it passes, exit back to DIS.
  9. Click on Diagnosis and DIS should now identify your car / carry out the short-test.
Troubleshooting:
  1. If you have access to more than one laptop, try installing DIS again on one of them, rather than wasting days on a problematic install. Some just don't want to work with virtual networking, but will probably work first time on another, similar laptop. [Reformatting the HDD and doing a fresh install of Windows XP SP2 may also fix the problem on a machine that will just not play ball.]
  2. If API-test fails - Check ediabas.ini has the right remote-host and port set / check VM network settings / try out this fix by changing addresses in Unix itself [] / ensure firewall is off and re-install DIS.
  3. If API-test passes, but DIS does not communicate - Check INPA is communicating and reboot DIS / check ediabas.ini has interface set to STD:OBD / check USB-serial port is set as COM1.
  4. DIS ERROR 200.19 - Battery is below 12v, connect a float-charger / check IP address is right for Diagnostic Head in DIS, Admin / check API-test passes.
  5. INPA ERROR IFS-0009 - Ensure USB-serial port is set as COM1 / check ediabas.ini has interface set to STD:OBD / make sure cable is working and fuse 25 has not blown.