Showing posts with label replace. Show all posts

Sunday, 26 May 2024

F10 530d Manual: Replaced leaking clutch slave-cylinder.

At the end of 2018 when I replaced the clutch on the F10 I threw on a new slave-cylinder while I was there, but I used a cheap spurious part, not OEM. It has been leaking for a while but I’ve started to lose my pedal and the topping up is becoming frequent, so time has come to replace it again. This time I went for an OEM Febi slave-cyl.

The spurious part from 2018 cost just £18 and is made from cast aluminium. You can see it’s poorly made compared to the OEM part, which is made of high-quality plastic. The Febi part was £57 still in 2024, but you can clearly see the improvement in build-quality. For such a critical part as the slave-cylinder it’s worth just paying the extra and avoid having to redo a messy, fiddly job!


As you can see, the cast-alloy slave-cylinder does not have the same look of build quality that the OEM plastic one does. It lasted 5 years and only about 25k miles, but was still good value for the price!

*GUIDE: Clutch Slave-cylinder replacement and bleeding guide for E30 / E28 / early E34 and E34*


Saturday, 30 April 2022

E90 318d: New rear caliper! [Reconditioned exchange part]

Rear O/S calliper was sticking on this 2005 E90. A re-conditioned genuine unit was sourced for just £45 with the old one being returned in exchange.

Not a bad hours work... remember to prime the new calliper with fluid and it hardly needs bleeding.

Sunday, 6 February 2022

E30 318i: Replacing Clutch Slave-Cylinder - Quick + dirty guide!

Clutch reservoir suddenly low on fluid? Gearbox housing covered in it? Sounds like a popped slave-cylinder. Not to worry, this has to be one of the easiest to replace ever made!

* This guide covers the M40 engine and 5-speed gearbox, but process is the same for most models. *

1. Lift the left side of the car.

2. Remove the 13mm nut from the outer side of the slave-cylinder. This one is easy to access and can be got with a ring-spanner or socket, but the ratchet is quite snug to the gearbox.

3. Remove the 13mm nut from the inner side of the slave-cylinder. This is quite difficult to get to as it is inhibited by the clutch-hose as well as limited access in the trans.-tunnel. I managed it with a socket and a 4" extension bar to get past the hose/pipe. 

* I have seen someone getting that difficult to reach nut using a longer extension bar and the ratchet further back behind the gearbox, but this was not possible on my E30, so I'm guessing this may be for 4-speed boxes or older M10/M20 engines. If yours cannot be got with the details in step 3, then try this. *

4. Remove the slave-cylinder fr the gearbox and allow to hang down on the hose.

5. Clamp the hose (optional, but saves time when bleeding system later).

6. Remove the hose end from the slave-cylinder using an 11mm wrench so the old unit can be discarded. [It is much easier to grip the slave-cyl. by hand while it is removed from the gearbox and get a turn on the pipe-collar, as well as minimising leaks from the hose.]

7. Prime the new slave-cylinder by removing the bleed-nipple and carefully pouring DOT4 brake/clutch fluid into the hole at the top for the hose/pipe until the air is displaced and the fluid run out of the lower hole. It won't need much. Refit and tighten the bleed-nipple. 

8. Refit the hose-end to the slave-cylinder and remove the hose-clamp if you're using one.

9. Refit the slave-cylinder to the gearbox and tighten the two 13mm nuts.

10. Top up the clutch reservoir with DOT4 brake/clutch fluid and bleed the system of air. [Which bleeding technique you use is up to you, but for all BMW clutches I would recommend using a one-way valve attached to the bleed nipple as detailed in THIS POST, which saves time and headaches.]

Sunday, 26 September 2021

E30 318i: Replacement Speedometer/ Odometer

Had to bite the bullet and buy a replacement speedo / odometer for project E30 this week as after many different attempts to fix the original one [THIS POST], I had to declare it totally junked. These are not cheap and sit around the £65-70 region, but I got a deal on one for £59... still an unwanted cost but at least I no longer have to tape an old iPhone to the dash with a speedo app!

Now the question is, do I swap in the number row from my old odometer or leave the ones in from this one, some 100k miles less.... Hmmm.

As per the pics, the areas of concern on my old speedo are not problem on the replacement, with resistors, capacitors and other components all looking mint. There is also no charring to the back of the PCB, so no sign of this unit overheating in the past and the odometer gearing is perfect. This unit has still covered 154k miles over the last 35 years, but has clearly had an easier life than the one from my E30!

Showing the healthy resistor on the newer speedo on the left and the burnt out one to the right.

Sunday, 5 September 2021

E46 318i Touring: Replacing leaky Oil Cooler gasket [N42]

After fixing the major oil leak from the rocker-cover gasket [THIS POST], I noticed there was still some oil pooling on the under-tray and a fews spots dripping onto the road. I traced the source up the right side of the engine (looking from the front) and could see oil filling up some cavities in the cylinder-head to the left of the oil-cooler / filter housing, so determined this to be the culprit... yes, another common one, especially if the filter-housing has been removed for previous engine work.

A replacement gasket was just £6.59 from eBay and comes as a two piece set including the main gasket that sits between the housing and the cylinder-head, as well as a smaller gasket that sits between the oil-filter housing and the coolant fed heat-exchanger. This latter one hardly ever leaks, as it's very rare to find a filter-housing that has been split apart during engine work, but it's nice to have one anyway and you may find it worth the time to replace this one while the housing is removed, though I could not see any signs of leakage so didn't bother.


GUIDE:

1. Remove the lid to the air-con ducting that sits atop the firewall at the back of the engine by undoing the clips a quarter-turn, take out the pollen-filter and remove the weather-strip seal from the firewall.

2. Remove the air-con ducting itself by undoing the four screws using a T30-Torx socket and lifting it out.

3. Remove the rear right-side engine cover by undoing the two stud-nuts using a 10mm wrench.\

** Make sure you have a cloth / plenty of tissue to catch any oil that runs from the housing. **

4. Remove the three screws holding the oil-filter / cooler housing to the cylinder-head using a 10mm socket with a long extension bar. One is clearly visible in front of the housing, the other two being hidden down the back.

5. Lift the oil-filter / cooler housing upwards out of the head, catching any wayward oil and lift the housing clear, rotating it so as not to put too much strain on the coolant-hoses. The hoses do not need removing or any coolant draining for this job.

6. Remove the old gasket and clean both mating surfaces with a cloth and I find it always worth scraping any crud off with a razor-blade.

7. Insert the new gasket to the housing. A lug on one side sits in a notch in the housing so the gasket can only fit in one way. [If it's an older engine or the housing has been removed a few times before, it might be worth taking a belts-and-braces approach by applying some gasket sealant to the mating surface on the head, as I did with some white Corteco.]

8. Carefully place the filter/cooler housing back onto the cylinder-head, trying to spill as little oil as possible on the mating surface and reverse steps 4-1 to refit.

Wednesday, 9 June 2021

E30 318i M40: GUIDE - Replacing lower inlet-manifold gasket - rough idle and stalling fixed!

After all the diagnosis and testing from THIS POST, I found the cause of my rough idle and stalling out when cold was a damaged paper gasket on the lower inlet-manifold allowing unmetered air to be drawn in to the plenum at will and confusing the AFM and DME over how much fuel to deliver. 

The engine just about ticked over when warm, albeit with a slight misfire. On cold startups however, the misfire was a lot more severe and at low revs the engine just couldn’t hold on, stalling out due to a way over-lean mixture. It would drive though, but there was no throttle response until about halfway up the rev range and power would arrive with a bang. It is amazing how sensitive these older engines with analog electronics are to unmetered air leaks!

IF YOU HAVE THESE SYMPTOMS, CHECK HERE!

I ordered a new gasket from eBay, it was a snip at £6.88. Be careful when ordering, older M10 engine gaskets are far more plentiful, so ensure yours is the right one for the M40... they have a funny shape which is quite distinctive. Choice was limited, in fact I could find one more gasket for sale of the right type and that came with a full £30 set including a head gasket, so be sure to check out carpartsinmotion, they have rare-fit stuff.

GUIDE:

1. Undo the jubilee-clip and disconnect the large rubber duct from the throttle-body using a flat screwdriver or 7mm socket.

2. Unclip the throttle-cable from the throttle-linkage and remove the two 10mm screws holding the metal plate to the throttle-body so the cable assembly can be moved clear.

3. Remove the wiring connectors from the throttle position sensor [TPS] and idle control valve [ICV].

4. Remove the rubber hose from the bottom of the ICV.

5. Remove the vacuum air hose from the front side of the throttle-body by undoing the jubilee-clip and teasing it off carefully with a flat screwdriver.

6. Remove the two coolant hoses from either side of the throttle-body by undoing the jubilee clips and teasing them off with a flat screwdriver. 

7. Remove the six nuts from the upper inlet-manifold using an 11mm wrench [9 in diagram] and two locating studs in the centre with a 10mm wrench [13 in diagram]. 

8. The upper inlet-manifold can now be lifted out of the engine bay.

9. Remove the wiring connector from the fuel-rail / injectors. 

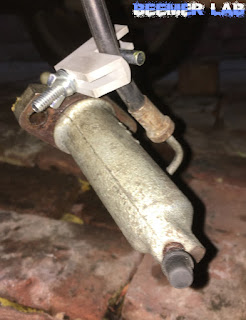
10. Remove the metal fuel send and return pipes from each end of the fuel-rail by undoing the jubilee clips. (This is where it gets messy, you may wish to plug or clamp the ends of these hoses). The send pipe is attached to the fuel pressure regulator [FPR] at the front of the fuel-rail and the return pipe is at the back of the rail.

11. Remove the five nuts holding the ports of the lower inlet-manifold to the head using an 11mm socket [4 in diagram].

12. Remove the two bracing bolts from the lower inlet-manifold using a 13mm socket. (They point towards the right side of the car) [11 in diagram].

13. The lower inlet manifold is now free to be removed. This can be a bit tricky as the rigid fuel pipes are routed through one of the gaps in the manifold ports. Also make a note of how the hoses to the throttle-body are routed through around the lower manifold, as it can be confusing once the upper manifold is bolted back in.

14. Clean off the mating surfaces of the cylinder head and the inlet manifold.

15. Carefully fit the new gasket to the studs on the head. It only fits one way round.

16. To refit reverse the above steps.

Monday, 31 May 2021

BMW E30: Digital Clock quick LED upgrade

The bulb had blown in my E30’s digital clock, so I decided to repair it with a quick and easy LED upgrade. It’s another bulb load of power taken off my 35 year old dash wiring so can’t hurt. 

The bulb-holder is integral to the working of the lamp, with the metal clips that hold it in place also acting as live/earth contacts. LEDs built into such a holder can be purchased specifically for replacing bulbs like this if you want to go that route, but if you have a bunch of cheap LEDs lying round and don’t want to spend any money then read on.

Simply remove the plastic holder and cut the old bulb away from the two pieces of metal. Solder a cheap yellow or red LED onto the metal contacts in the place where the bulb was attached and bend the LED stalks back on themselves so the diode is pointing the right way, as in pic. A pure-white LED would probably be better, but they use more wattage, will probably require a spend and cheaper dome LEDs work fine anyway.

The bulb for the clock has a resistor built in anyway, so the LED will run fine and not pop without modification, but if you find it is too dim or bright to you can ‘piggy-back’ another resistor across the stock one to raise or lower resistance to suit. A calculator to help work out what resistance you need are easily available online, but trial and error is best if you have a bunch of LEDs / resistors lying round.

You may want to cover the recess at the back of the clock with electrical tape to stop light spilling out.

Monday, 24 May 2021

E30 318i: New Bosch spark plugs + correct coil fitted

With the car still misfiring a bit, I turned my attention to the plugs and HT leads. All appear fine. The coil works because there is a spark. I inspected the plugs, a set of NGK R that don't look particularly ancient, expecting one or more to be wet with unburnt fuel from a combination of misfiring and running an over-rich mixture from tweaking the air-flow meter [AFM]. I noticed that the plugs were in fact all dry and totally black with soot at the tips from over-fuelling, but their condition seemed fine. This matched the points in the distributor-cap, which were also blackened.

The spark plugs were working, but they didn't seem to fully igniting the mixture and performing weakly, so I turned my attention back to the coil. A previous owner had fitted a universal 'Sports coil' and judging by the shiny casing it doesn't look too old, so I couldn't see how it could be at fault. Thats when I noticed the terminal connecting it to the HT lead. It's about 10mm wide and has a metal inner lining. There is a screw at the bottom holding it in. This is obviously designed for a different type of HT lead than fitted to BMW, as the lead has a rubber plug where

it contacts the copper casing of the terminal in the coil. The metal terminal in the HT lead is designed to fit over a stud inside the coil-terminal, which is what I've always seen before, not just in BMW. This means the only contact being made by the main HT lead was its very tip touching the screw at the bottom of the coil-terminal.

I swiftly ordered a used OEM Bosch coil unit from eBay for £15. A 'Sports coil' type with the correct end was about £35, but I figured it was best to go original, at least for the time being while I iron out the M40 engine's running problems. While I was at it, I bought some OEM Bosch spark plugs for £13, which is cheap and I thought I may as well rule out plug condition as a factor with not knowing how long the incorrect coil has been fitted to the E30. 


Monday, 12 April 2021

E46 318i Touring: Back on the road with new battery!

Despite paying road-tax and insurance on the E46 Touring it's been laid up for 6 months and with an improvement in the weather it's high time I put it back on the road. All it really needed was some air in the tyres and the brakes beating up. The battery was totally dead, however. The previous owner had put an AGM [automated glass-mat] battery design for vehicles with Start/Stop technology on it, which was great but clearly the 19 year old alternator and charging setup on the E46 was not up to the job of charging it properly. Ah well, it has lasted for over twelve months... 

I've always sworn by Bosch batteries, but the £100+ price tag these days, yes even with a Euro Car Parts discount code, is a bit too expensive for this car. ECP, as well as the parts dept. at work can offer a budget Lion battery for a little over £50, but I have been warned by everyone willing to give their fifty pence that these don't last five minutes and I should avoid like the plague. Ultra-budget batteries can be found on eBay for as little as £27, but who knows anything about their quality.

At this point I have to hand it to the parts dept. at work here, who loaded me up a Yuasa 3110 series battery [760Ah] for just £60 all in! Yuasa get a good write up, in fact I am told they beat Bosch in tests and are currently one of the best on the market. ECP could offer me a Yuasa for £67, but it was a tiny little square battery and this just goes to show how useful working or knowing someone in the motor-trade can be...


Thursday, 3 December 2020

F10: Rear Shock Absorber / Strut / Spring Replacement [GUIDE]


Time to do the rear struts and springs on the 530d F10 this week as one damper has been leaking and while doing my tyres last week I noticed the spring has now broken at the bottom so this is now an urgent job. I picked up a pair of used complete struts (spring, damper and top-mount) from eBay for just £100. They are from another 530d and claim to be from a low mileage car. Well, they look a lot lower mileage than the ones I'm taking off lets put it that way and appear to be in pretty good condition. I get a lot of stick for constantly using second-hand genuine parts, but I still prefer this to buying new spurious parts where I can and have never had an issue!

GUIDE:

* This is not a difficult or time-consuming job, but will require a bit of brute force. *

1. First the rear seats need to come out. Lift the seat squab up at the front and detach it from the push-studs, press the seat-belt receivers through the recesses and lift the squab out. Next lift the seat-back upwards until it is free of the hooks at the top and lift that out, being careful of the door-sill paintwork and sliding it through the seat-belts. [You could always unbolt the seat-belts at the base using a T45-Torx socket to make this easier, but it's not essential].

2. The parcel-shelf now needs to come down in order to access the strut-top mount bolts in the shock-turrets. Remove the C-pillar trims by prizing out the plastic caps labelled 'Airbag' from the trim and removing the screw using a T25-Torx socket. Now carefully pull away the C-pillar trims and put to one side. Remove the five push-pin clips from the front edge of the parcel-shelf by levering the button in the centre upwards and pulling the plastic pin out. The studs can now be levered out. The parcel-shelf is now free to pull forwards and can be rested where the seat-back would be. [Remove the wiring-connectors to the speakers, but these should pop out by themselves anyway].

3. Lift the car and remove the corresponding wheel. [There is no need to be getting under the car for this job, so a jack and axle-stand is fine].

4a. The track-strut (pictured) needs to be moved out of the way to access the bottom strut bolt so first remove the plastic clips holding the E-brake wire-harness to the track-strut by levering them open at the bottom with a flathead-screwdriver and separating them from the strut. The wire-harness can be moved out of the way.

4b. Remove the bolt holding the inner end of the track-strut using an 18mm wrench. Pull the track-strut down and rotate it so it is pointing out of the wheel-arch. You now have plenty of room to get at the bottom strut bolt and lift the shock out.

5. Remove the bolt holding the bottom of the strut to the hub using a 21mm wrench.

6. Lift the triangle flap in the foam underneath where the parcel-shelf was to expose the studs to the strut-top mount and remove the three nuts using a 13mm wrench.

7. Wiggle the bottom of the strut free from the hub and the entire strut assembly is now free to be removed. It should be able to be lowered through the remaining suspension parts and to the rear of the car until it is free to be removed.

** IF YOU ARE CHANGING THE SPRING / TOP-MOUNT OR SWAPPING THESE ONTO A NEW STRUT THEN DO THIS NOW** [See this post for guide].

8. Make sure the new strut has the top-mount in line with the old one you removed by lying them next to each other and checking the bottom bolt-eyelet and triangle marking on the top-mount match up. [The triangle marking on the top-mount should face towards the back of the car with the bolt-eyelet facing the centre, or with the triangle marking facing you the bolt-eyelet should be pointing to the right for O/S (right-side) and left for N/S (left-side)].

9. Lift the new strut back up through the suspension and line it up into the strut-turret. [Triangle marking on top-mount facing rear of car] and screw the three 13mm nuts back on a few threads.

10. Lever the hub downwards until it meets the bolt-eyelet at the bottom of the strut meets its recess on the hub and screw the 21mm bolt back in about half-way.

11. Fully tighten the three 13mm nuts on the strut-top mount.

12. Fully tighten the 21mm bolt through the bottom of the strut.

13. Replace the track-strut / wheel as a reversal of steps 3 and 4.

14. If you are doing both sides then repeat steps 3 - 13 for the opposite side.

15. Replace the parcel-shelf, trim and rear seat as a reversal of steps 1 and 2.

Sunday, 29 November 2020

E81 120d M-Sport: New springs and dampers!

Sean at work has a 1er with nearly 200k miles on the clock, through you would never tell as most of the parts have been replaced since he got it for a mere £700. Yes, you can get a zippy M-Sport 120d for this price, but unless you are willing to get your hands dirty I wouldn't recommend it. Of course, you probably are willing to do that or you wouldn't be here in the first place, so go sick there are bargains out there!

This time it's having new rear springs and dampers as one has leaked all of its fluid and is jammed in position. The opposite side was constantly hitting the bump-stop. She rides good now.


Wednesday, 25 November 2020

F10 530d: 4 new Run Flat tyres (Goodyear Excellence 255/55/17)

 My run-flats that came with the F10 have been run practically, well, flat. They were an advisory on my previous MOT and the last 12 months have not been kind to them with the F seeing a fair bit of use and the two rears are about 1mm from the wear bar, so with the next test looming its time to throw some fresh rubber on.

I went for the same, like-for-like Goodyear Excellence that were fitted when I picked the car up, in 255 / 55 / 17 size. I'm not sure if these are standard fit from BMW, but it's what the police were running on it for high-speed pursuit, so they will do for me and my mainly sedate driving style...

They aren't cheap kit. Even with a discount through work I was quoted £233 for two new tyres and I needed four. This price I would consider prohibitive just for new rubber when I can get four new regular tyres for as little as £100 the lot, but the Goodyear is what I wanted so I went for used tyres. Well, they are hardly used, with the set I bought having 7mm+ of tread left and a 2019 DOT code. Three of them have a puncture repair in the tread, but even so the deal I got was too good to turn down... £250 for all four!


Run Flats or normal tyres??

I've grown used to these Goodyear tyres over the last five years, though they would not be my first choice in normal circumstances. The grip, noise and ride are all pretty good and I've had a decent run out of them given the amount of tread left when I bought the car. They have suffered two punctures during that time and this is where the Run Flats show their worth. The first I repaired straight away, but on the other occasion I ended up driving for four days and covered 75 miles on a tyre with zero PSI, yes that's ZERO air in it and to be honest the tyre still performed perfectly and there car drove as normal. OK I would NEVER recommend anyone doing this, but yes they work and are worth the extra money they cost! The downside of this convenience is the harsh, bumpy ride due to the reinforced side-walls. This may be a big factor on low-profile tyres, for instance I had 18" alloys on my E60 with Run Flats and the ride was pretty harsh, and I would imagine it gets even worse for 19" and 20" with tiny side-walls, but with my current 17 inch rims with a 55 profile side-wall the ride is actually very good, so this argument becomes negligible! 

Sunday, 3 November 2019

BMW F10 / F11 / F07: FUSE BOX DIAGRAM - Detailed with all Definitions

Here is a detailed fuse box guide for BMW F10 etc. as none seem readily available. I will update as I go...

* PDF download here. *

ENGINE BAY:
No. Application
1 Engine control (EC) relay
F01 30A Engine management
F02 10A Nitrogen oxide (NOx) sensors
F05 7.5A Exhaust gas recirculation (EGR) cooler pump

PASSENGER COMPARTMENT [GLOVE BOX]:


Fuse No. Rating Application
1 Ignition main circuits relay
2 Rear screen wiper relay
F1 10AMultifunction control module
F2 5AABS/ESP system, door function control modules, tailgate automatic opening/closure
F3 5ACAN data bus gateway control module, data link connector (DLC)
F4 5AMultimedia control module
F5 -
F6 Shunt
F7 30AMultifunction control module 1
F8 30AMultifunction control module 1
F9 30AMultifunction control module 1
F10 10AInstrument panel, multifunction control module 1
F11 7.5AAC/heater system
F12 5AGlove box lamp, multifunction control module
F13 5AExterior lamps, multifunction switch (steering column), multi switch assembly
F14 15AMultifunction control module 1, central locking
F15 20AMultifunction control module 1, central locking
F16 40AMultifunction control module 3, exterior lamps
F17 30AMultifunction control module 3, electric windows
F18 30AMultifunction control module 3, electric windows
F19 20ATrailer socket
F20 -
F21 30ADiesel: Selective catalytic reduction (SCR) additive system control module
Petrol: Not used
F22 30ADiesel: Engine management
Petrol: Not used
F23 5ATelematics, telephone system
F24 10AMultifunction switch (steering column)
F25 5AHead up display
F26 5AInstrumentation control module
F27 5ATelephone system
F28 5A>08/10: Entertainment system
09/10> Not used
F29 7.5A>08/10: DVD changer
09/10-06/12: Not used
5A07/12> Entertainment system, multimedia control module
F30 Shunt
F31 5AAC/heater system (rear), heated rear seats
F32 7.5A>12/10: Multifunction switch (driver's door), multifunction switch (passenger door), RH door mirror. 01/11> Multifunction control module 7, vanity mirror lamps (rear)
F33 5ASeat belt tension motor, driver seat belt tension motor, passenger, glow plugs, engine management, starter motor
F34 5AMultifunction control module 5
F35 10A/15ADiesel: Engine management
10APetrol: Engine management
10AHybrid models: AC refrigerant control valve, hybrid drive system
F36 30AHeadlamp washers
F37 30ASuspension control system
F38 40AMultifunction control module 4, central locking
F39 40AActive steering
F40 30AABS/ESP system
F41 -
F42 30ADiesel: Engine management
Petrol: Not used
F43 5AAll models: power steering
5AN57 engine: Engine management
5AN53/N54 engines: Module cooling fan
F44 5A AC system, high beam assistant, lane change assist, lane departure warning system, multifunction control module 6
F45 5A Active steering, suspension control system
F46 5A Cruise control distance range sensor, engine coolant radiator shutter actuator
F47 20ADiesel: Exhaust gas recirculation (EGR) cooler bypass valve, exhaust gas recirculation (EGR) cooler pump
Petrol: Not used
F48 5A All models: Auto-dimming rear view mirror
5ADiesel: Engine breather heater
5AHybrid models: Engine mounting control system
5AN52 engine: Secondary air injection (AIR) pump
F49 Shunt
F50 40A Hybrid models: Hybrid drive system
Other models: Not used
F51 30A Windscreen wipers
F52 30A Electric seat, driver
F53 30A Electric seat, passenger
F54 20A Auxiliary power sockets
F55 20A Rear screen wiper
F56 5A Multifunction control module 4, central locking
F57 15A LH Headlamp
F58 5A Audio unit suppressor, multifunction control module 7
F59 10A Turbocharger (TC) intercooler coolant pump
F60 5A Parking brake
F61 20A Multifunction control module 7
F62 15A Horns
F63 10A Transmission control
F64 7.5A Transmission gear selection switch
F65 15A >08/11: Auxiliary power sockets
20A09/11>: Auxiliary heater, auxiliary power sockets
F66 7.5A >12/10: Multifunction control module 7
7.5A01/11>: Multifunction switch (driver door), multifunction switch (passenger door), RH door mirror
F67 10A Electric front seats
F71 40A AC/heater blower motor (front)
F72 50A ABS/ESP system
F73 60A Engine coolant blower motor
F74 -
F75 50A Fuel filter heater

REAR LOAD COMPARTMENT [TRUNK/BOOT]:


No. Rating Application
F100 20A Trailer socket
F101 40A Multifunction control module 3
F102 Shunt
F103 -
F104 Shunt
F105 30A >08/10: Audio unit amplifier
09/10-07/12: Not used
20A08/12>: Audio system
F106 Shunt
F107 5A Hybrid models: ABS/ESP system hybrid drive
5AOther models: Charging system (auxiliary battery)
F108 5A >06/12: Engine management
07/12-06/12: Not used
07/13>: RH headlamp
F109 -
F110 10A Door function control module, driver
F111 15A Diesel: Selective catalytic reduction (SCR) additive system control module
Petrol: Not used
F112 -
F113 -
F114 -
F115 -
F116 7.5A Entertainment system
F117 5A Telematics, telephone system
F118 10A Entertainment system, multifunction display
F119 15A Audio system
F120 5A Audio unit output amplifier, DVD changer
F121 5A Audio unit cooling fan, entertainment system
F122 -
F123 5A Parking aid camera control module
F124 5A Night vision system
F125 5A Entertainment system
F126 -
F127 10A LH headlamp
F128 -
F129 -
F130 -
F131 5A Lane change assist control module, right
F132 5A >08/10: Electric auxiliary heaters (rear)
09/10-06/12: Not used
07/12>: Cornering lamps
F133 -
F134 5A Four wheel steering, parking aid
F135 5A Exhaust gas control solenoid
F136 5A DC/DC converter
F137 5A Engine coolant blower motor
F138 5A Differential lock control module (S63 engine), four wheel drive system
F139 5A Tyre pressure monitoring system, fuel tank leakage diagnostic module
F140 -
F141 -
F142 20A >06/12: Auxiliary heater
07/12>: Not used
F143 10A Door function control module, driver's side rear
F144 10A Door function control module, passenger
F145 20A Trailer socket
F146 -
F147 15A Auxiliary power sockets
F148 20A Tow bar retract control module, trailer socket
F149 10A Door function control module, passenger side rear
F150 -
F151 -
F152 5A Ride height control system - estate
F153 5A Boot lid/tailgate opening-closing motor
F154 5A Luggage compartment lamp
F155 15A Boot lid/tailgate lock
F156 -
F157 5A Parking brake
F158 -
F159 5A >06/12: Alarm system horn
5A07/12>: Alarm system horn, engine
F160 -
F161 -
F162 -
F163 -
F164 -
F165 -
F166 -
F167 -
F168 -
F169 -
F170 -
F171 -
F172 15A RH headlamp
F173 -
F174 -
F175 -
F176 -
F177 20A AC/heater blower motor (rear)
F178 30A Differential lock control module (S63 engine), four wheel drive system
F179 30A Parking brake
F180 30A Parking brake
F181 -
F182 40A Suspension compressor pump (estate)
F183 40A Boot lid/tailgate opening-closing motor
F184 20A Fuel pump (FP)
F185 -
F186 30A DC/DC converter, transmission fluid pump (hybrid models)
F187 30A Seat heater control module, rear
F188 30A Seat heater control module, rear
F189 -
F190 30A Seat heater control module 1
F191 30A Seat heater control module 2
F192 -
F193 -
F194 -
F195 30A Auxiliary heater (LH rear)
F196 -
F197 -
F198 >08/11: Not used
30A09/11>: Seat belt tension motor driver, seat belt tension motor passenger
F199 >08/11: Not used
30A09/11>: Seat belt tension motor driver, seat belt tension motor passenger
F200 40A Audio unit amplifier
F201 -
F202 30A Auxiliary heater (RH rear)
F203 30A Heated rear window
F204 30A Heated rear window


SECOND REAR LOAD COMPARTMENT:
No. Application
F500 Battery condition sensor
F501 60A Four wheel steering control module
F502 100A Engine management
F503 100A >08/10: Load area fuse box/relay plate 1
09/10>: Not used
F504 250A Fascia fuse box/relay plate
F505 100A Engine coolant blower motor
F506 >08/11: Not used
150A09/10>: Load area fuse box/relay plate 1
F507 125A Battery control module (auxiliary battery)
F508 -
F509 50A Audio unit amplifier